DIY Recipe Box

IMG_3856

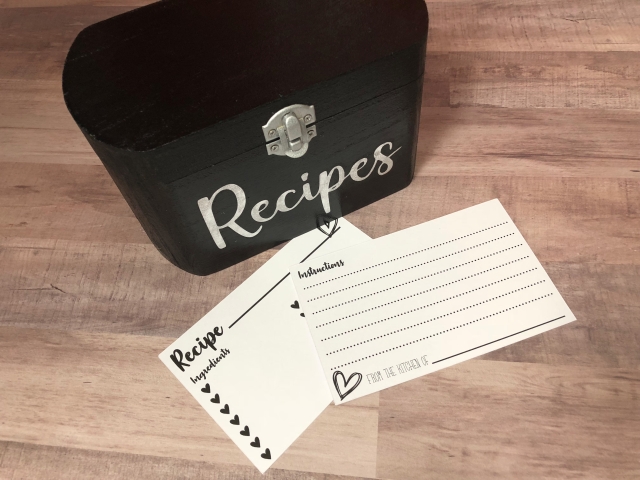
As of today, my recipes will no longer be stored on Pinterest! Officially, I have finished my recipe box. Since, I love to can and my husband loves to cook, this will be very useful and I love that it didn’t cost much at all to make.

Starting with the supplies…

IMG_3837

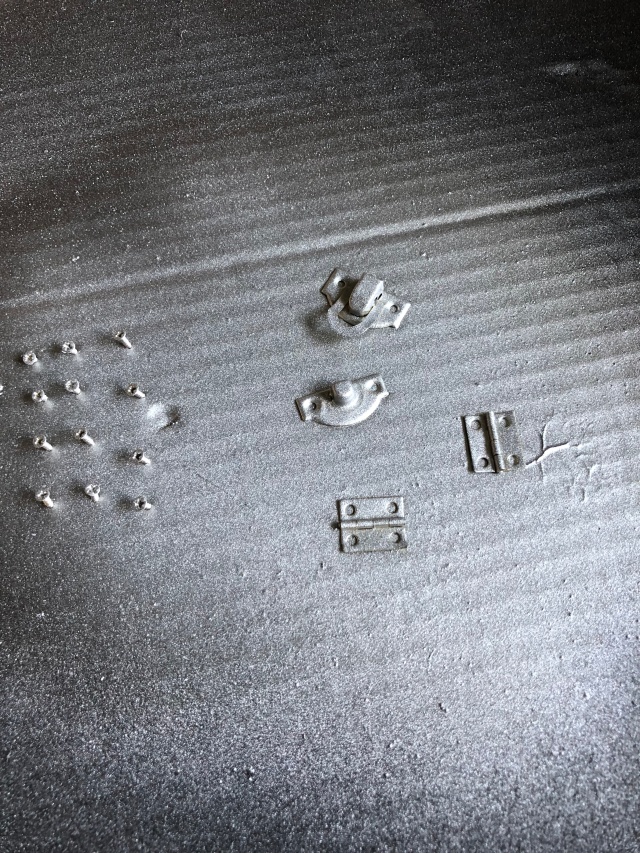
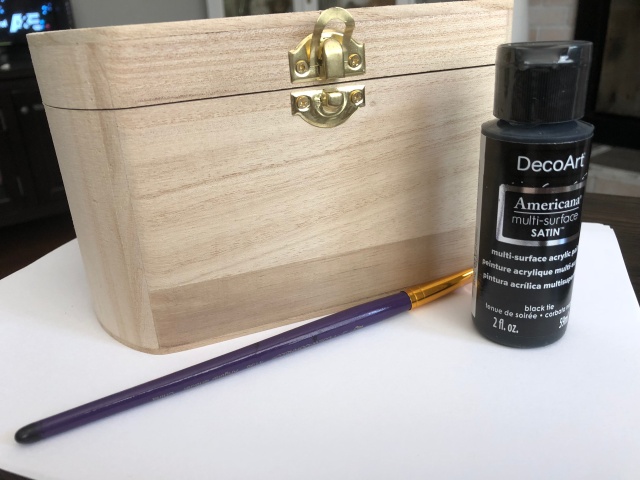
A wooden box (found at Michael’s), black paint and a brush. I removed all of the hardware before I painted the box. Once the box was painted, I sprayed the gold hardware silver.

IMG_3842

My choice in colors was to match my kitchen, but I know some bright and fun colors would add a pop of color to anyone’s kitchen. 🙂

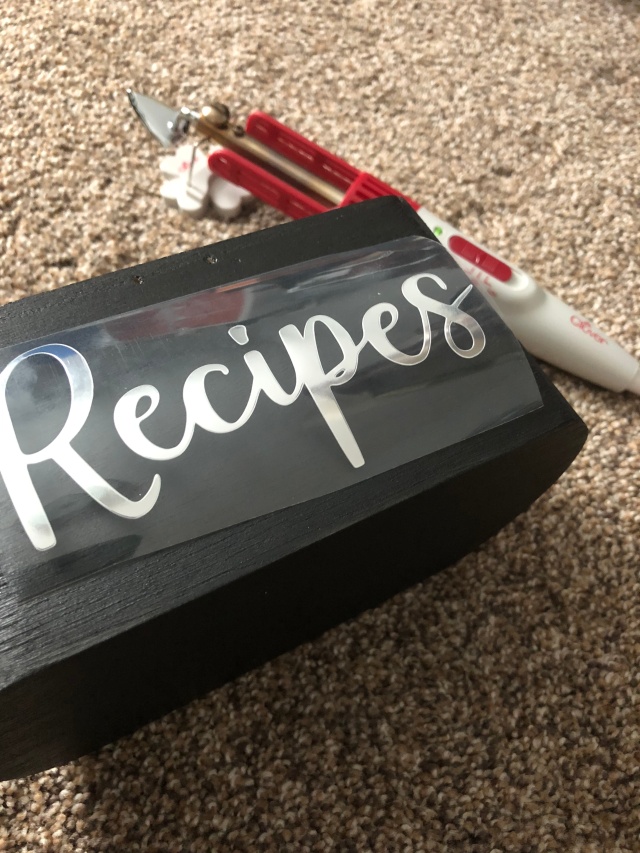
Cut out of HTV, I ironed “Recipes” on with my craft iron.

IMG_3838

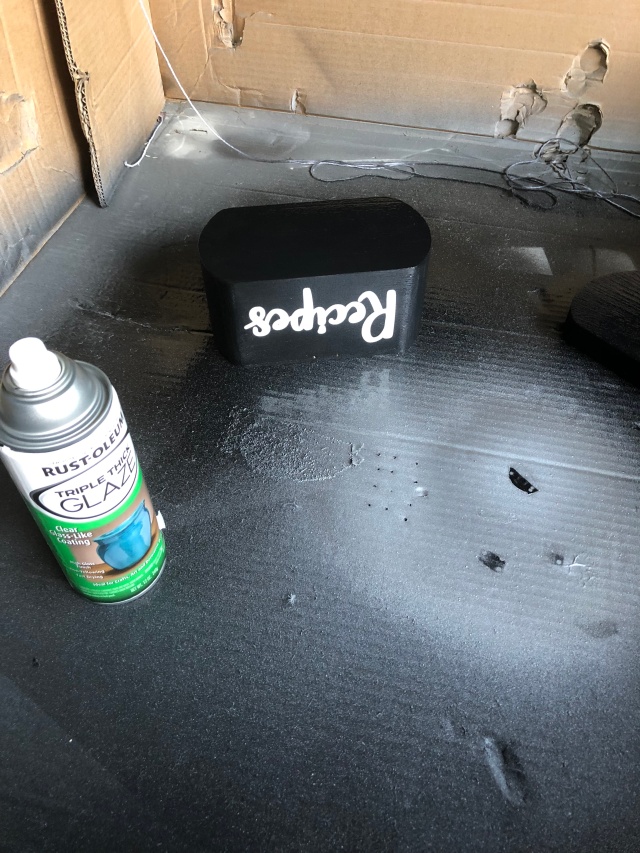
Sprayed the entire box with clear coat.

IMG_3846

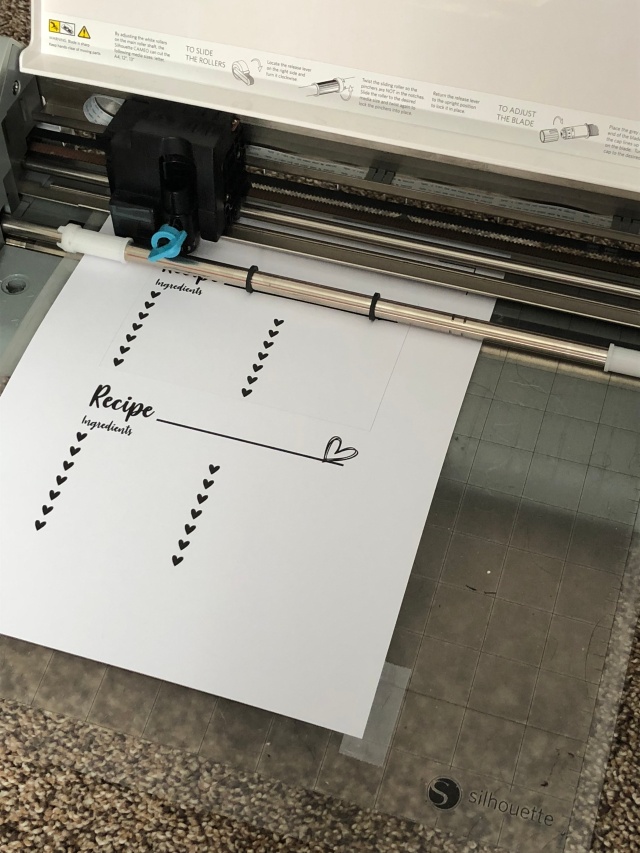
Once everything was dried and the hardware was replaced, I started working on cutting out the cards I designed.

IMG_3853

The only thing missing are some dividers – still have to cut those out. Only took a couple of hours, mostly waiting for paint to dry, but loving my quick and easy recipe box.

IMG_3856

DIY Photo Magnets

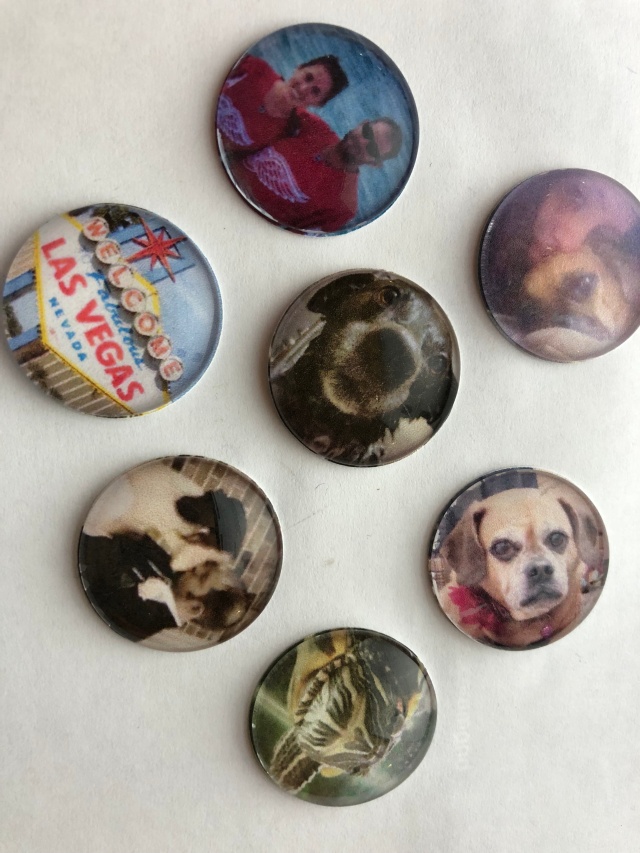
I love photos, but pictures can take up a lot of room on our fridge so combining them with magnets is a win-win. A bonus: All your magnets will look the same.

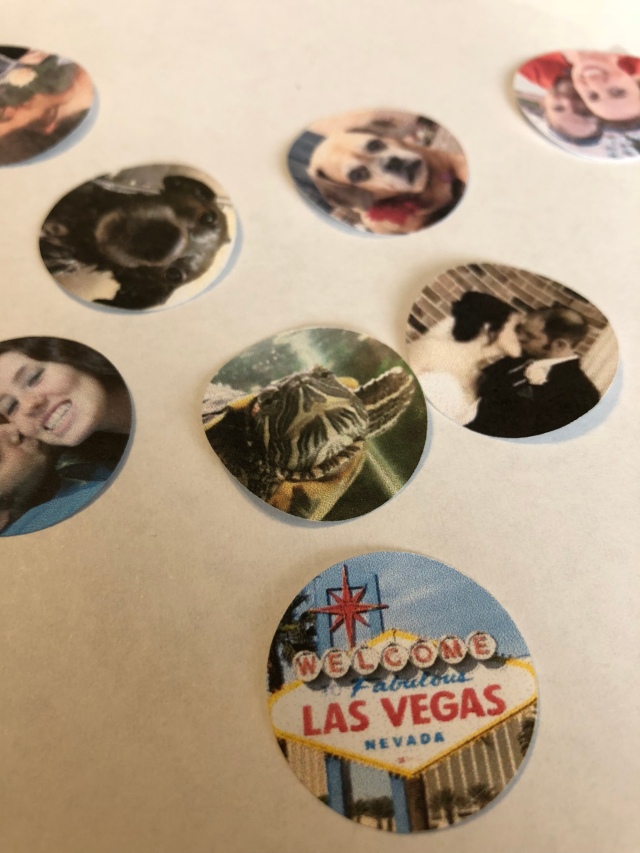
This is a very simple project that is easy for everyone. First things first, you’ll need to shrink your photos down to fit in a 1″ circle (I had some help with my Silhouette Cameo).

2CCA419D-67EE-474E-9BF8-55358A170A13

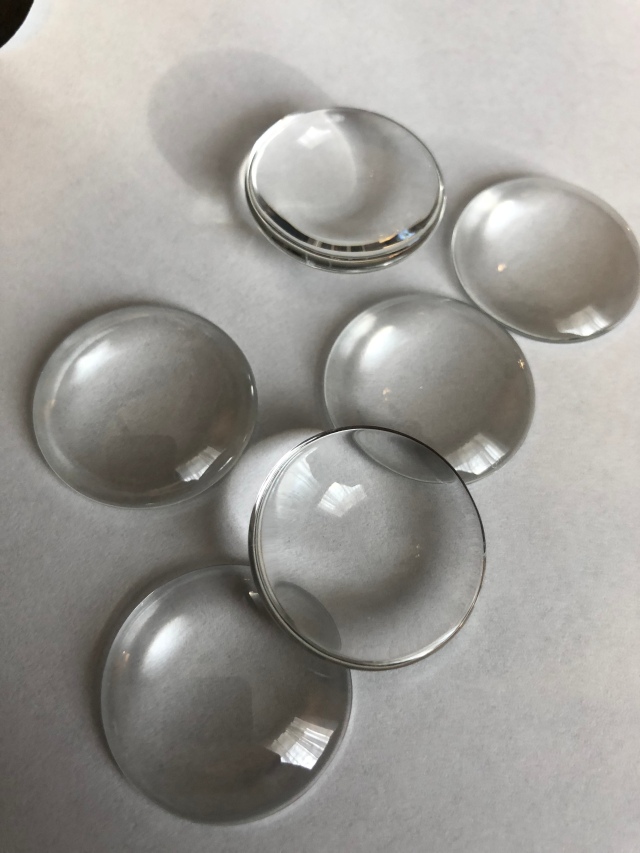
Next, stock up on the 1″ glass circles found in the jewelry section.

1B4D7F1B-6576-4891-95B8-C4E0F3A4AB00

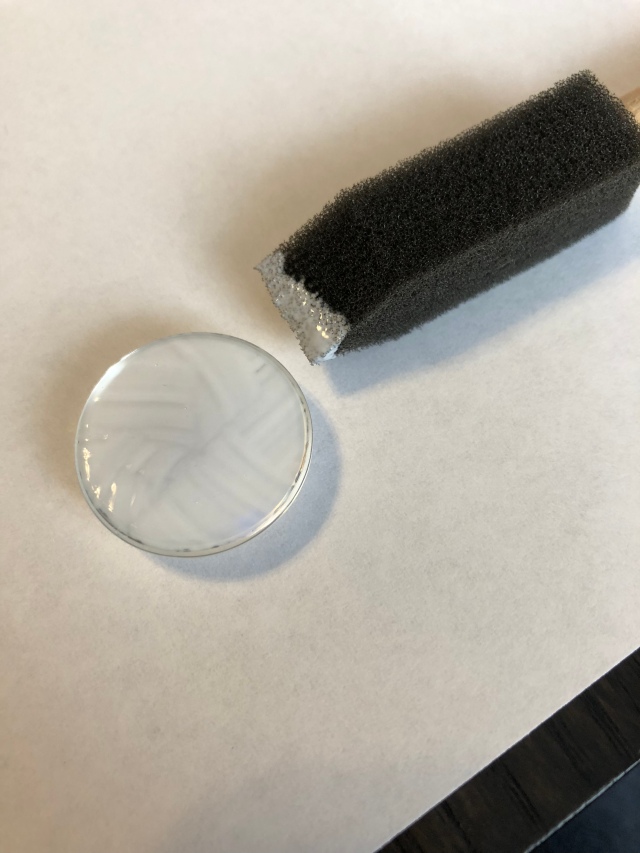
These circles will be flat on one side and rounded on the other. If you do not have a machine to cut out a perfect circle, you can use the glass circles to trace a circle onto your photo and cut out with scissors. Next step is to grab the mod podge! I used matte. Paint the back (flat side) of the glass circle. Don’t paint the pictures, it may smear the ink and you’ll be back at step one. You don’t need a lot of mod podge either just enough to cover the surface.

6FF4D154-0A35-42A1-B598-E449CDAE7324

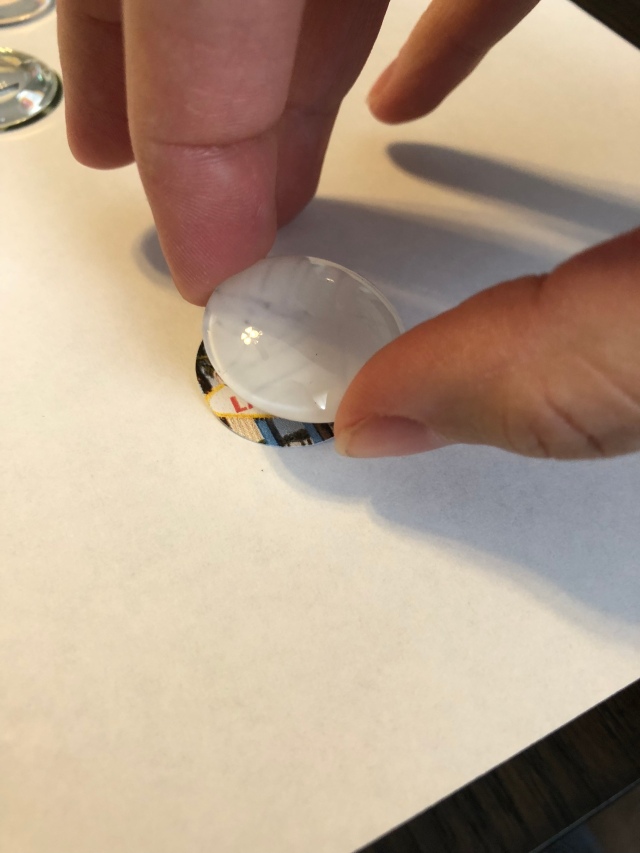
Flip your circle over onto your cut out photo.

28D7F239-2996-4263-A13D-77DFBE8FEB48

It is okay if it doesn’t go on perfectly you have a moment before the mod podge starts to dry to shift the glass to the position you want. Apply some pressure to squeeze out any air bubbles. Let them dry. After they are dry, put a coat or two on the back to seal the picture down and prevent the E6000 from soaking through.

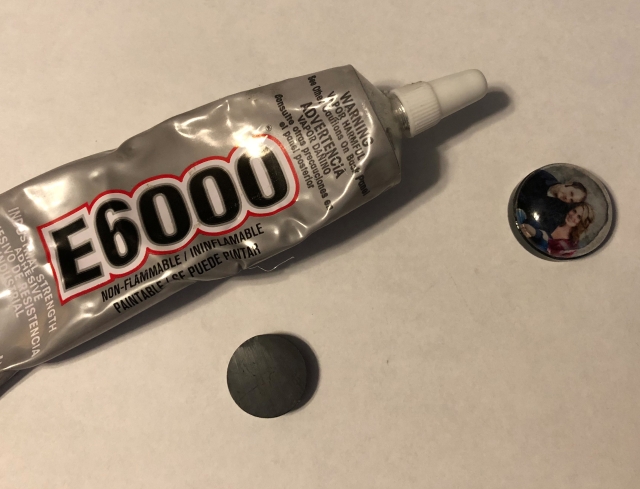
Once the picture is completely dry, take E6000 and apply some to the 1″ magnet, that you totally picked up with the glass circles. We are making magnets…. You don’t need much – this glue is the mother of all glues and will ooze so less is more. This glue with your skin, or anything on you for that matter, is not a good combo, so use with caution. Place the glass circle onto the magnet. Apply some pressure and let dry overnight.

E6000

You’ll wake up to cute handmade magnets! Now your fridge photos have a purpose.

IMG_2802


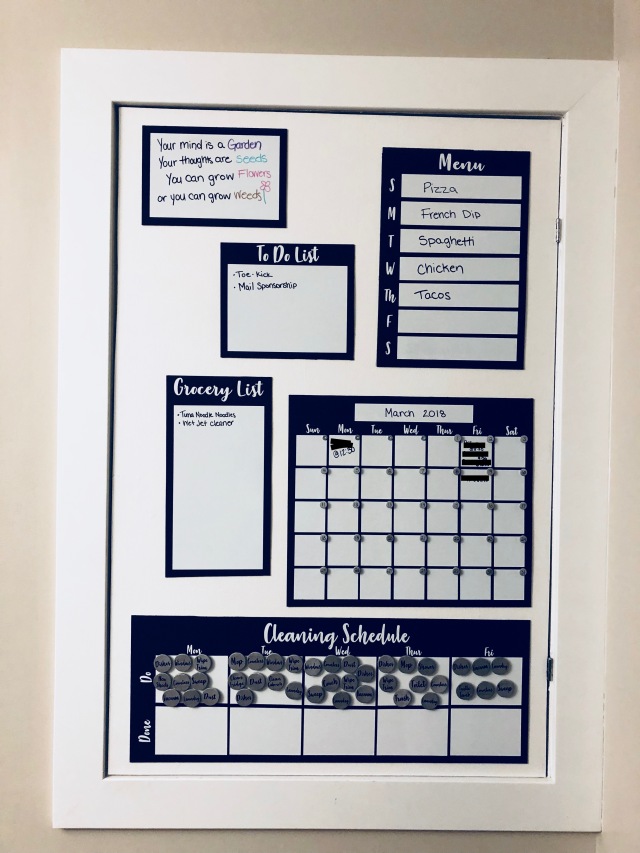
Family Command Center

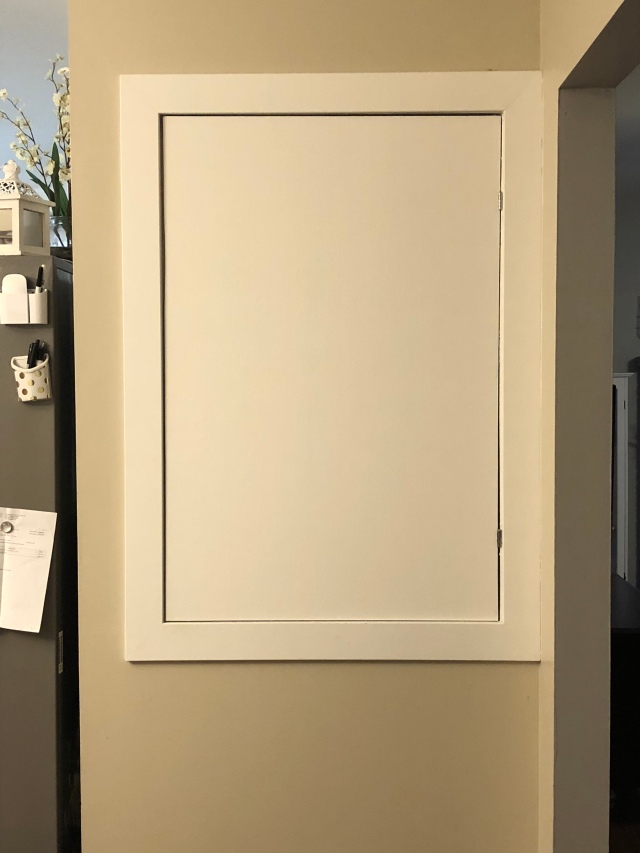
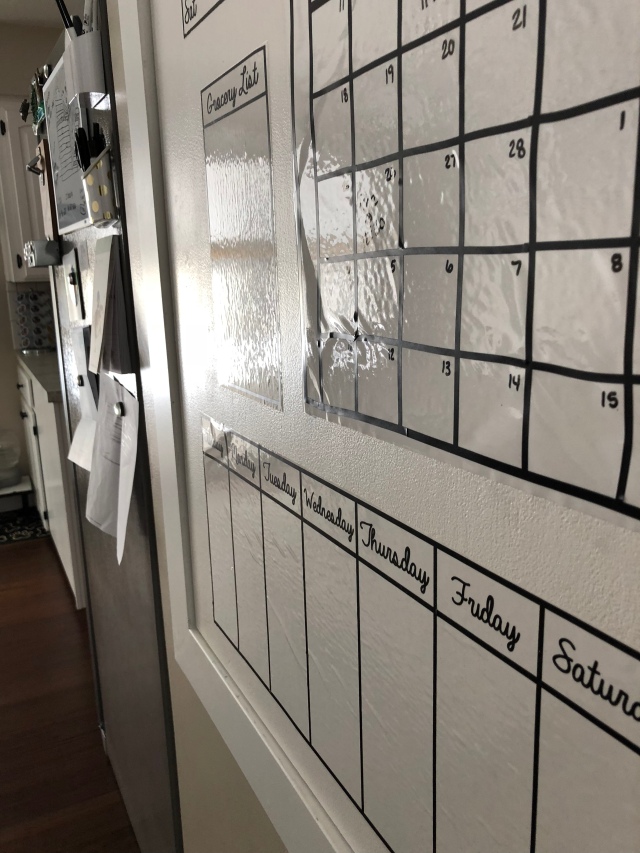
We have this awesome cabinet above our stairwell that hides all our kitchen gadgets. I had painted the door white shortly after we purchased our house, because it was forest green, but the door is big and plain, so it soon became the perfect spot for our family command center.

IMG_2408

At first, I used the whiteboard vinyl and stuck it directly to the door with black vinyl for outlines.

IMG_2384

Despite my procrastination on finishing, it had functionality. It’s helped us to stay more organized and is used daily. Lately, I’ve been wanting to revamp the look and functionality of it, as well as, finishing it. Placing the whiteboard vinyl on a textured door didn’t hold up too well, so I was pretty set on a redo. More crafting? Sign me up!

IMG_2389

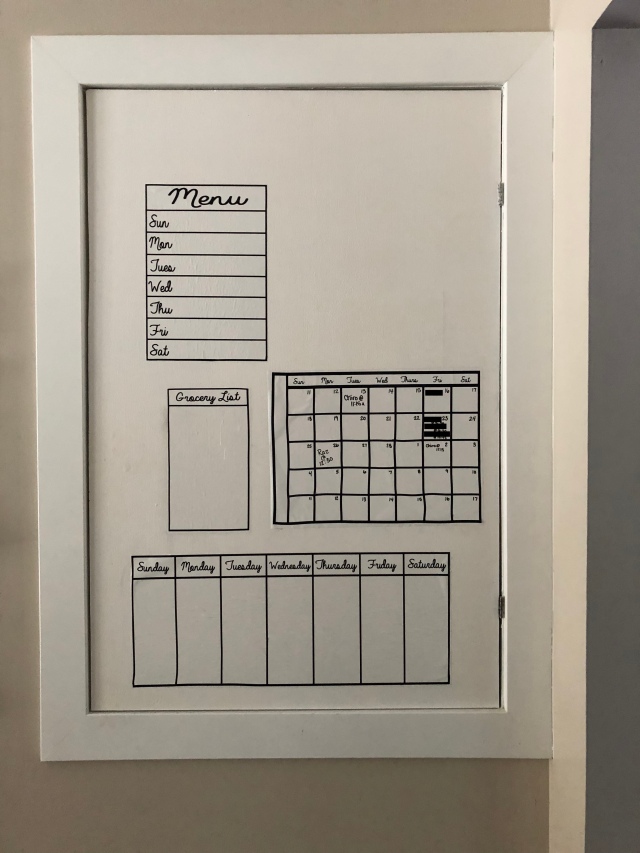
This project took some thinking due to the functionality of it. Having the whiteboard vinyl was a must, but I wanted to be able to erase quicker without the black vinyl and have the ability to switch the dates without rewriting the entire calendar each time.

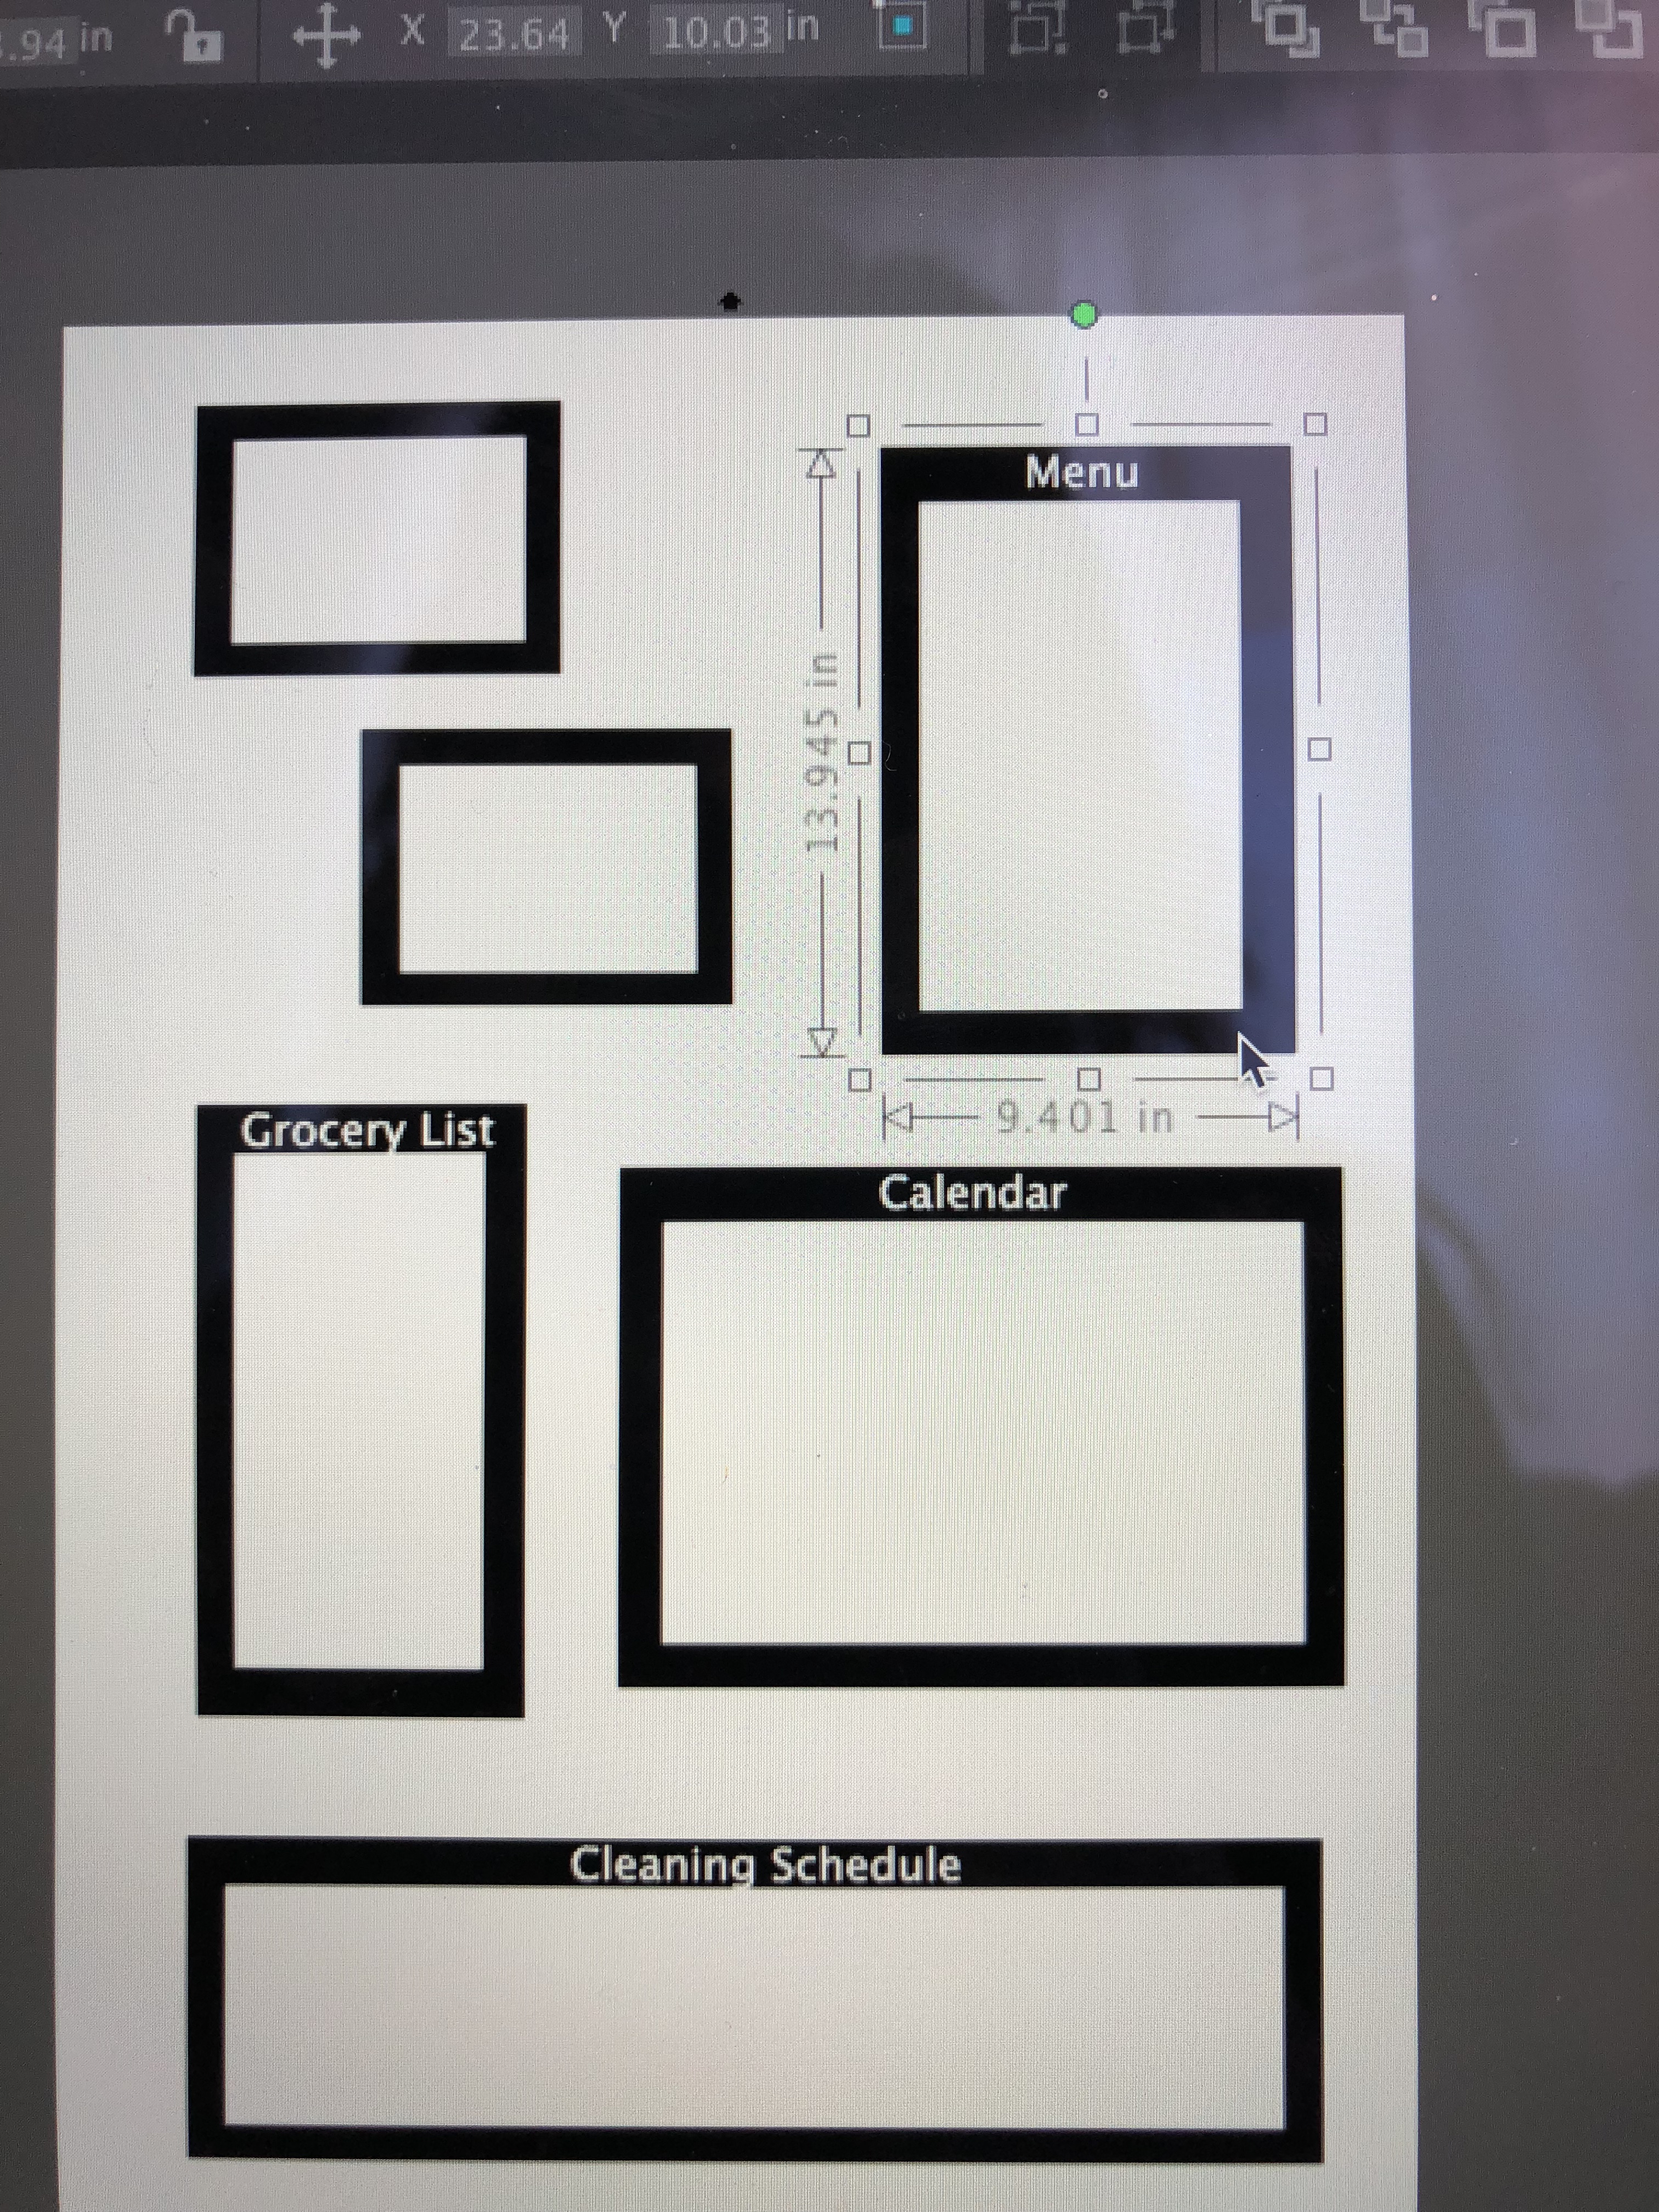
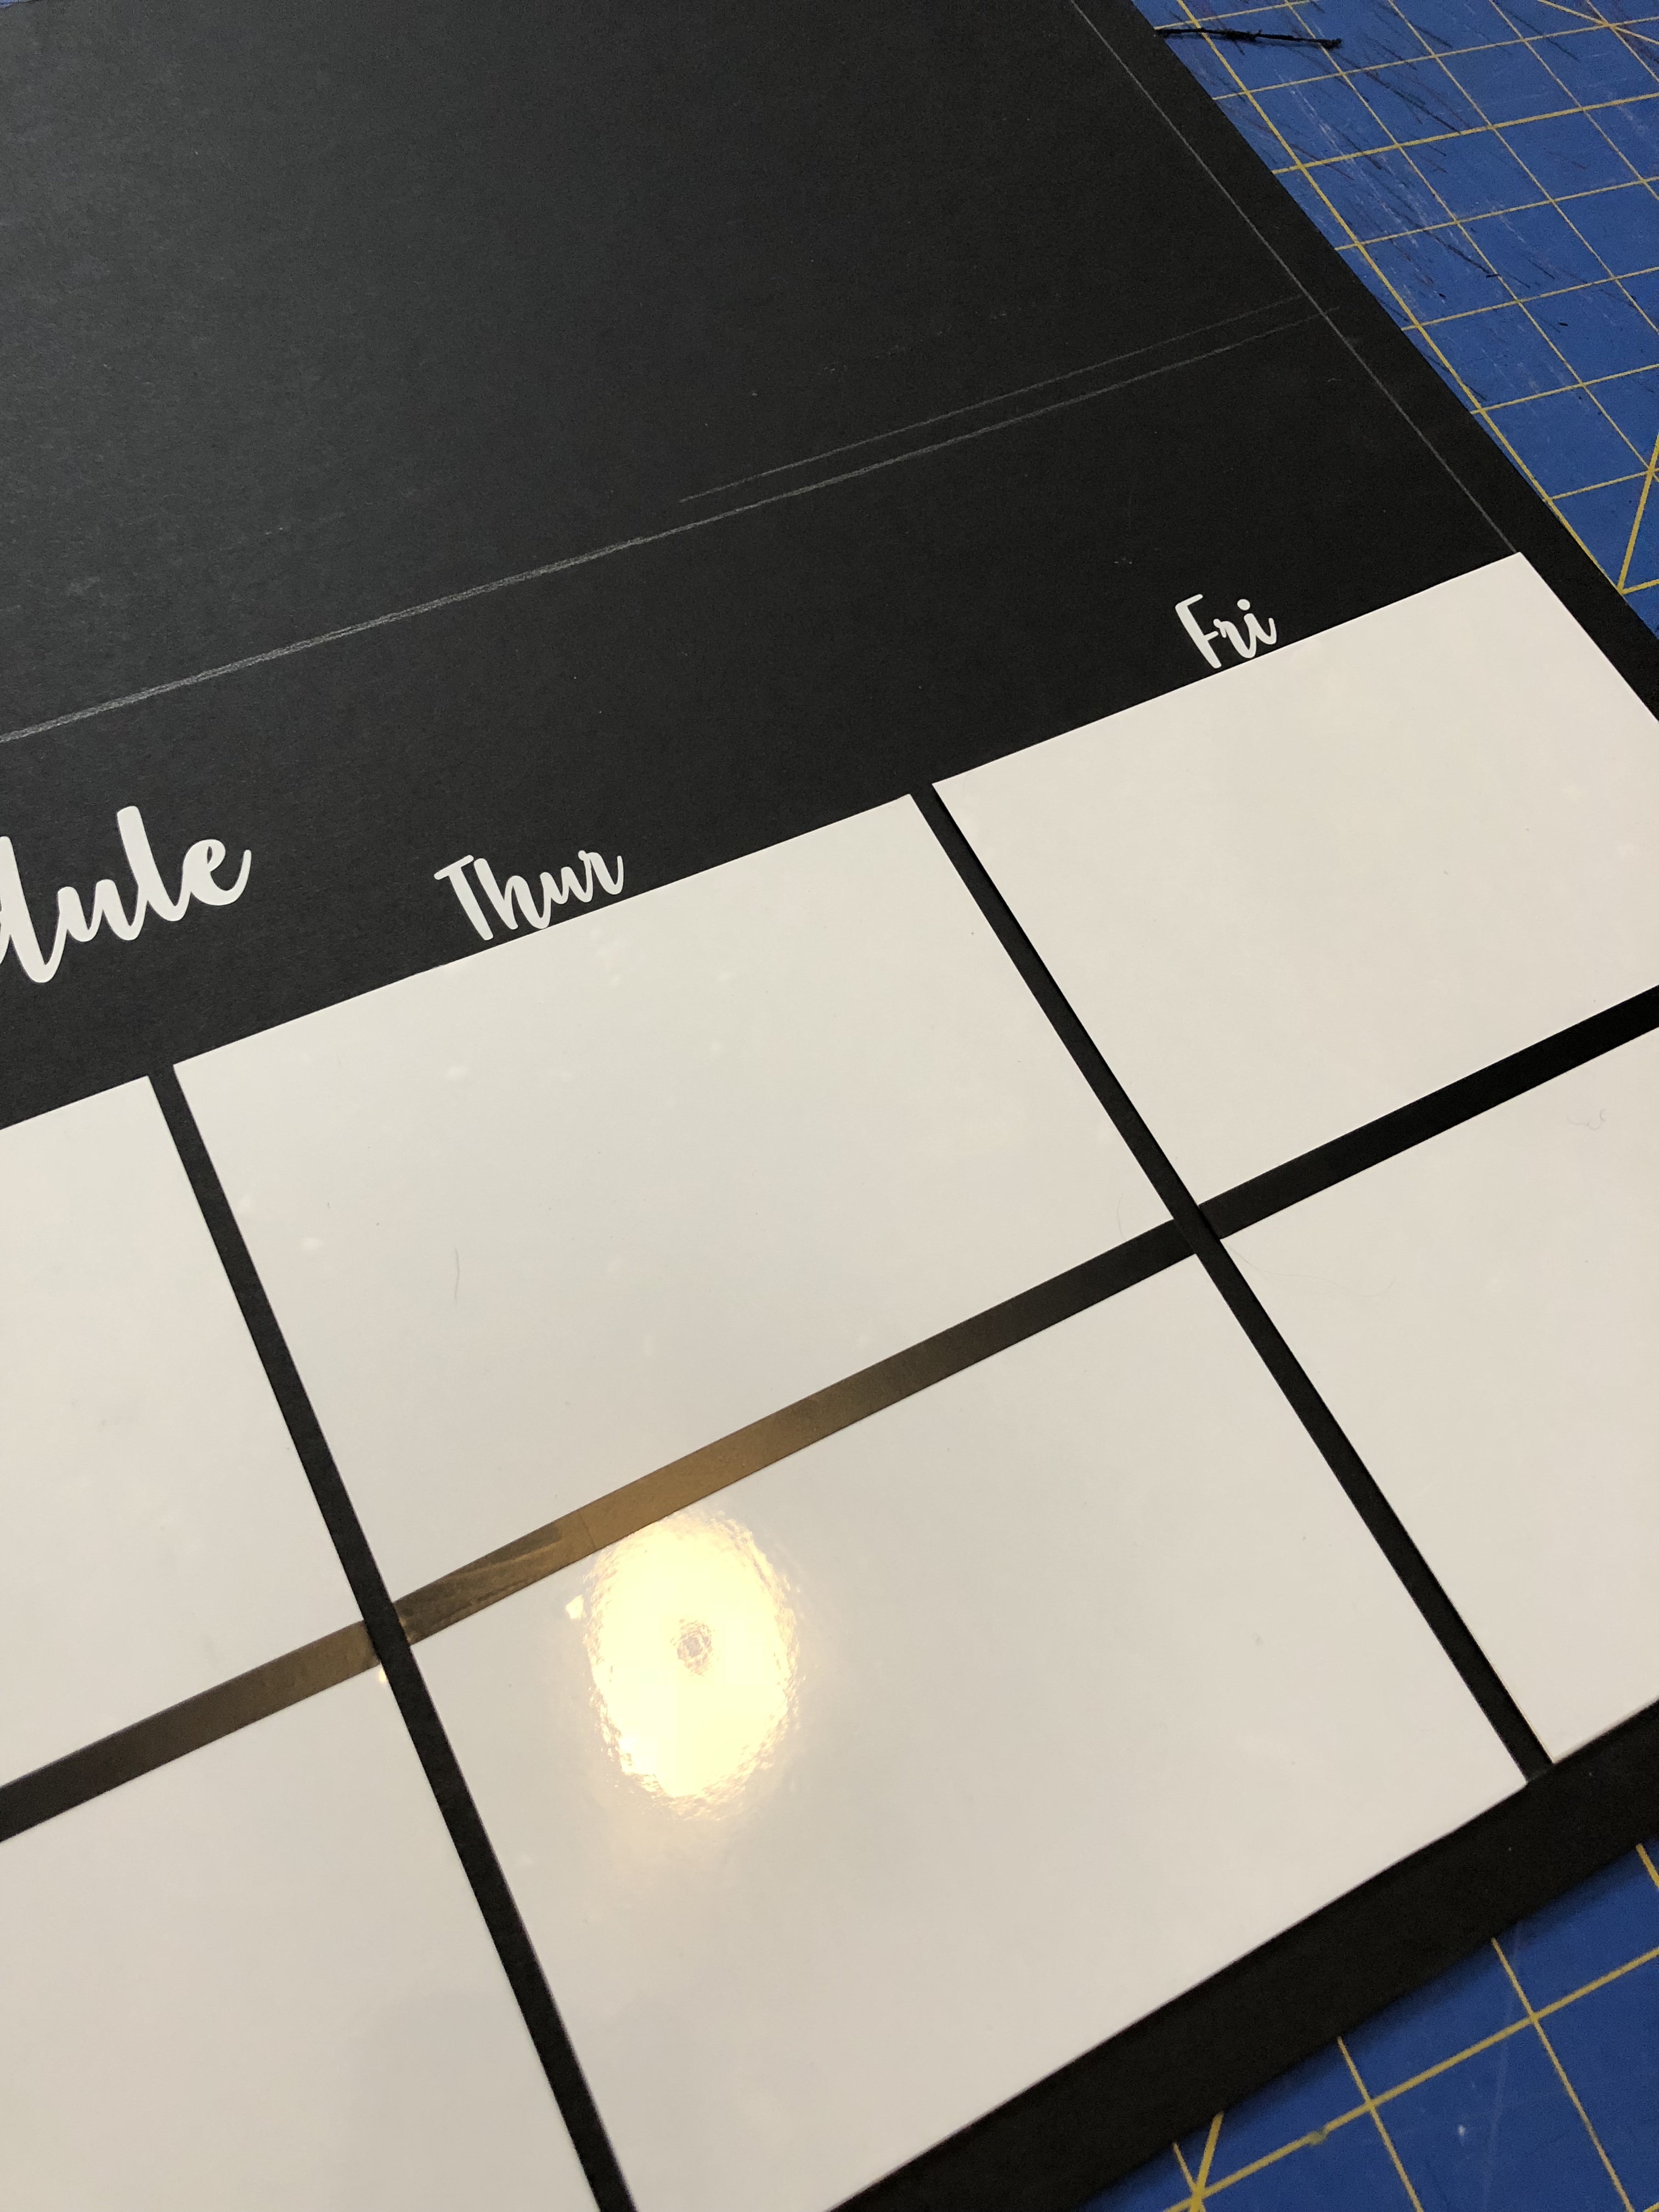
Placing the black vinyl on top of the whiteboard vinyl was a challenge and near impossible to get it on straight, so this time I wanted black boarders, with the whiteboard on top. I ended up picking up a 3’x4′ mat board from the craft store for my frames and a roll of whiteboard vinyl. The mat board would give the vinyl a smooth flat surface to adhere to better than what the door could offer. In Silhouette Studio, I laid out our new command center.

IMG_2377.jpeg

The easiest way to accomplish the first steps was to cut the white squares/rectangles out with my cameo, use a ruler to place them on the huge mat board, then cut the mat board with a knife.

IMG_2420.jpeg

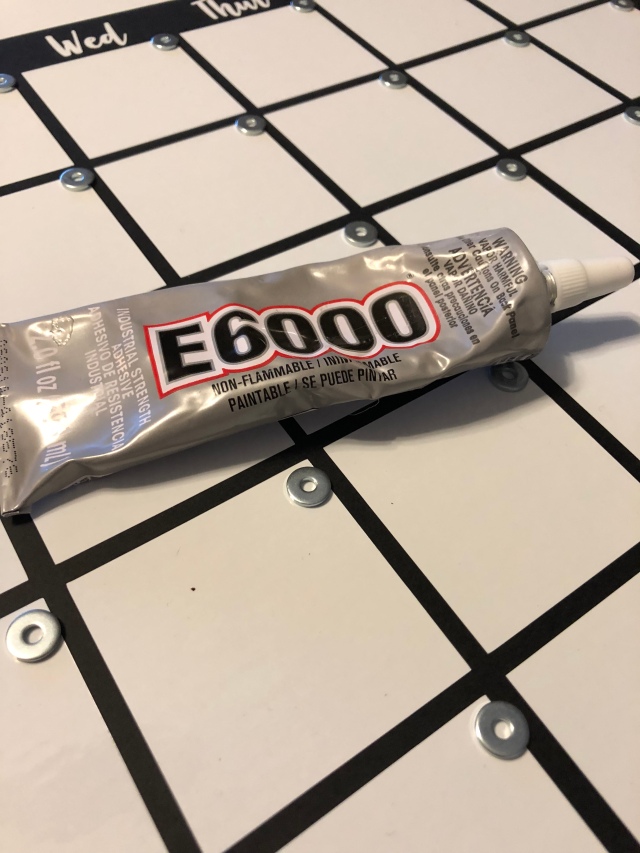
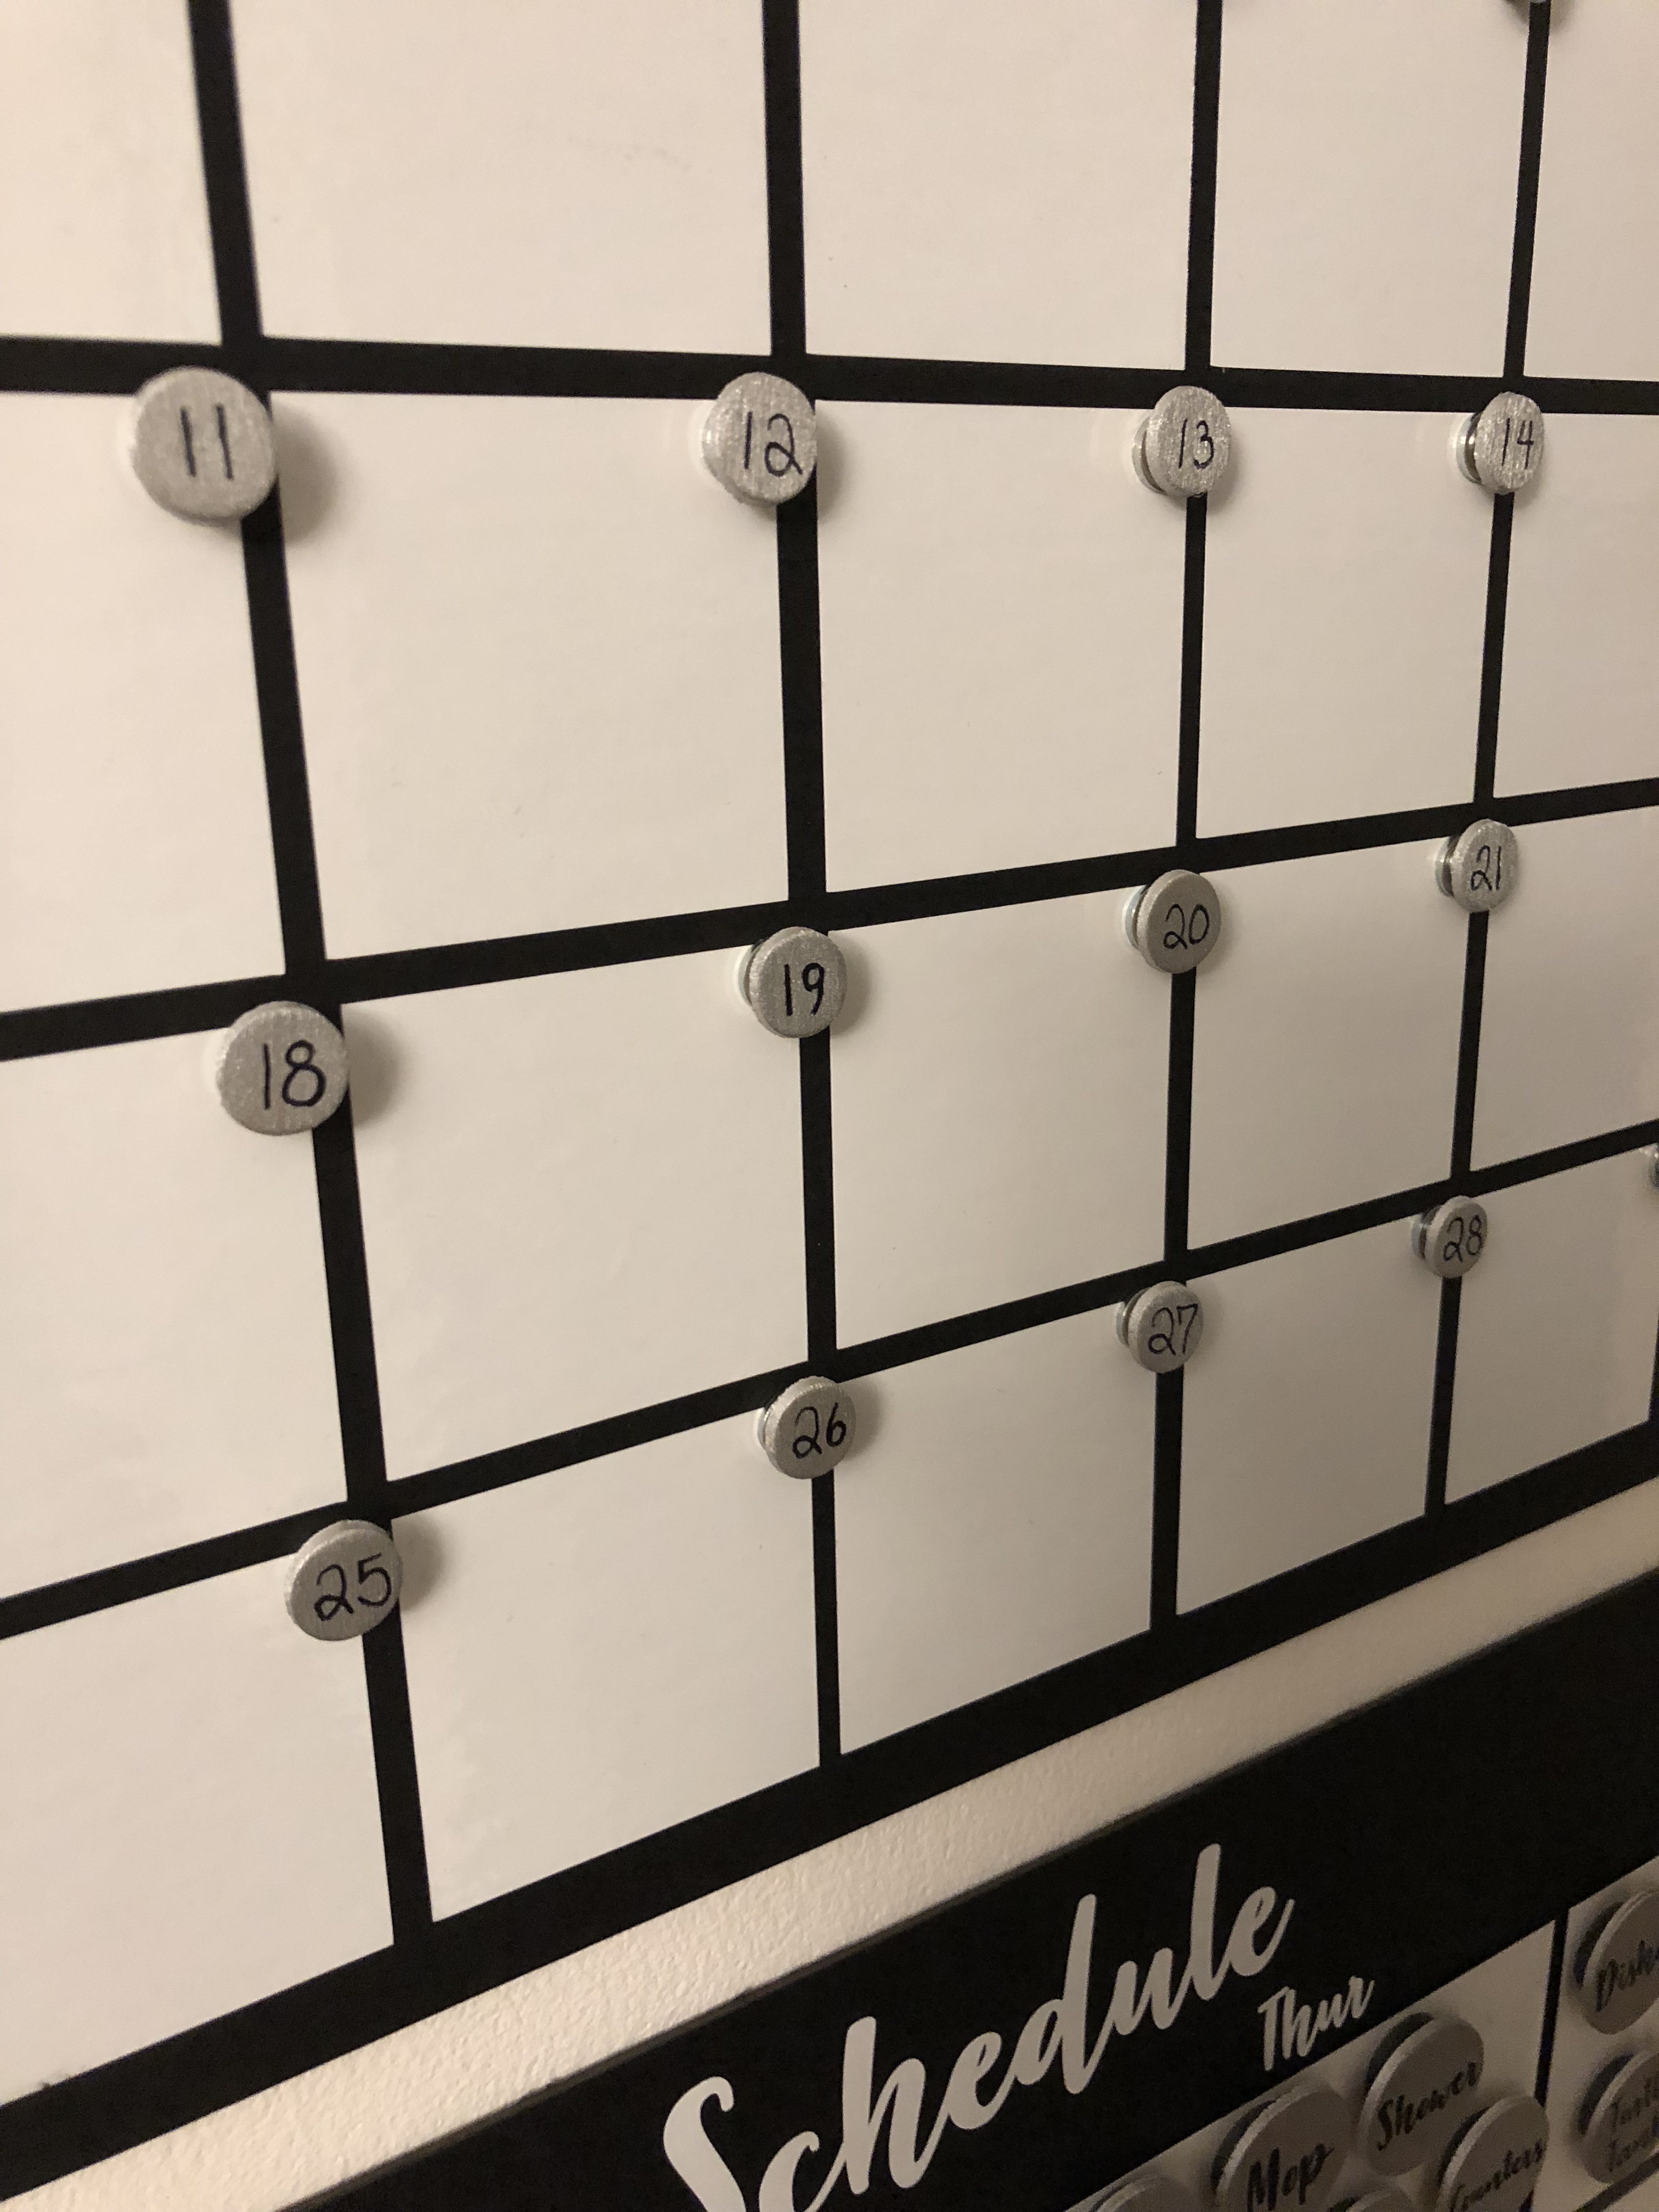
Most of them just needed those steps but the calendar would need something more to make it easier to switch the dates. I wanted magnets, but figuring out what I would use for the magnets to stick to took some time. Finally – washers, steel washers. At the hardware store, I found the smallest steel washers and grabbed some small magnets. After painting my wooden circles, I used strong adhesive to attach the magnets to the calendar.

IMG_2415

Writing the numbers wasn’t my favorite idea but because of their size it was a lot more convenient.

IMG_2455.jpeg

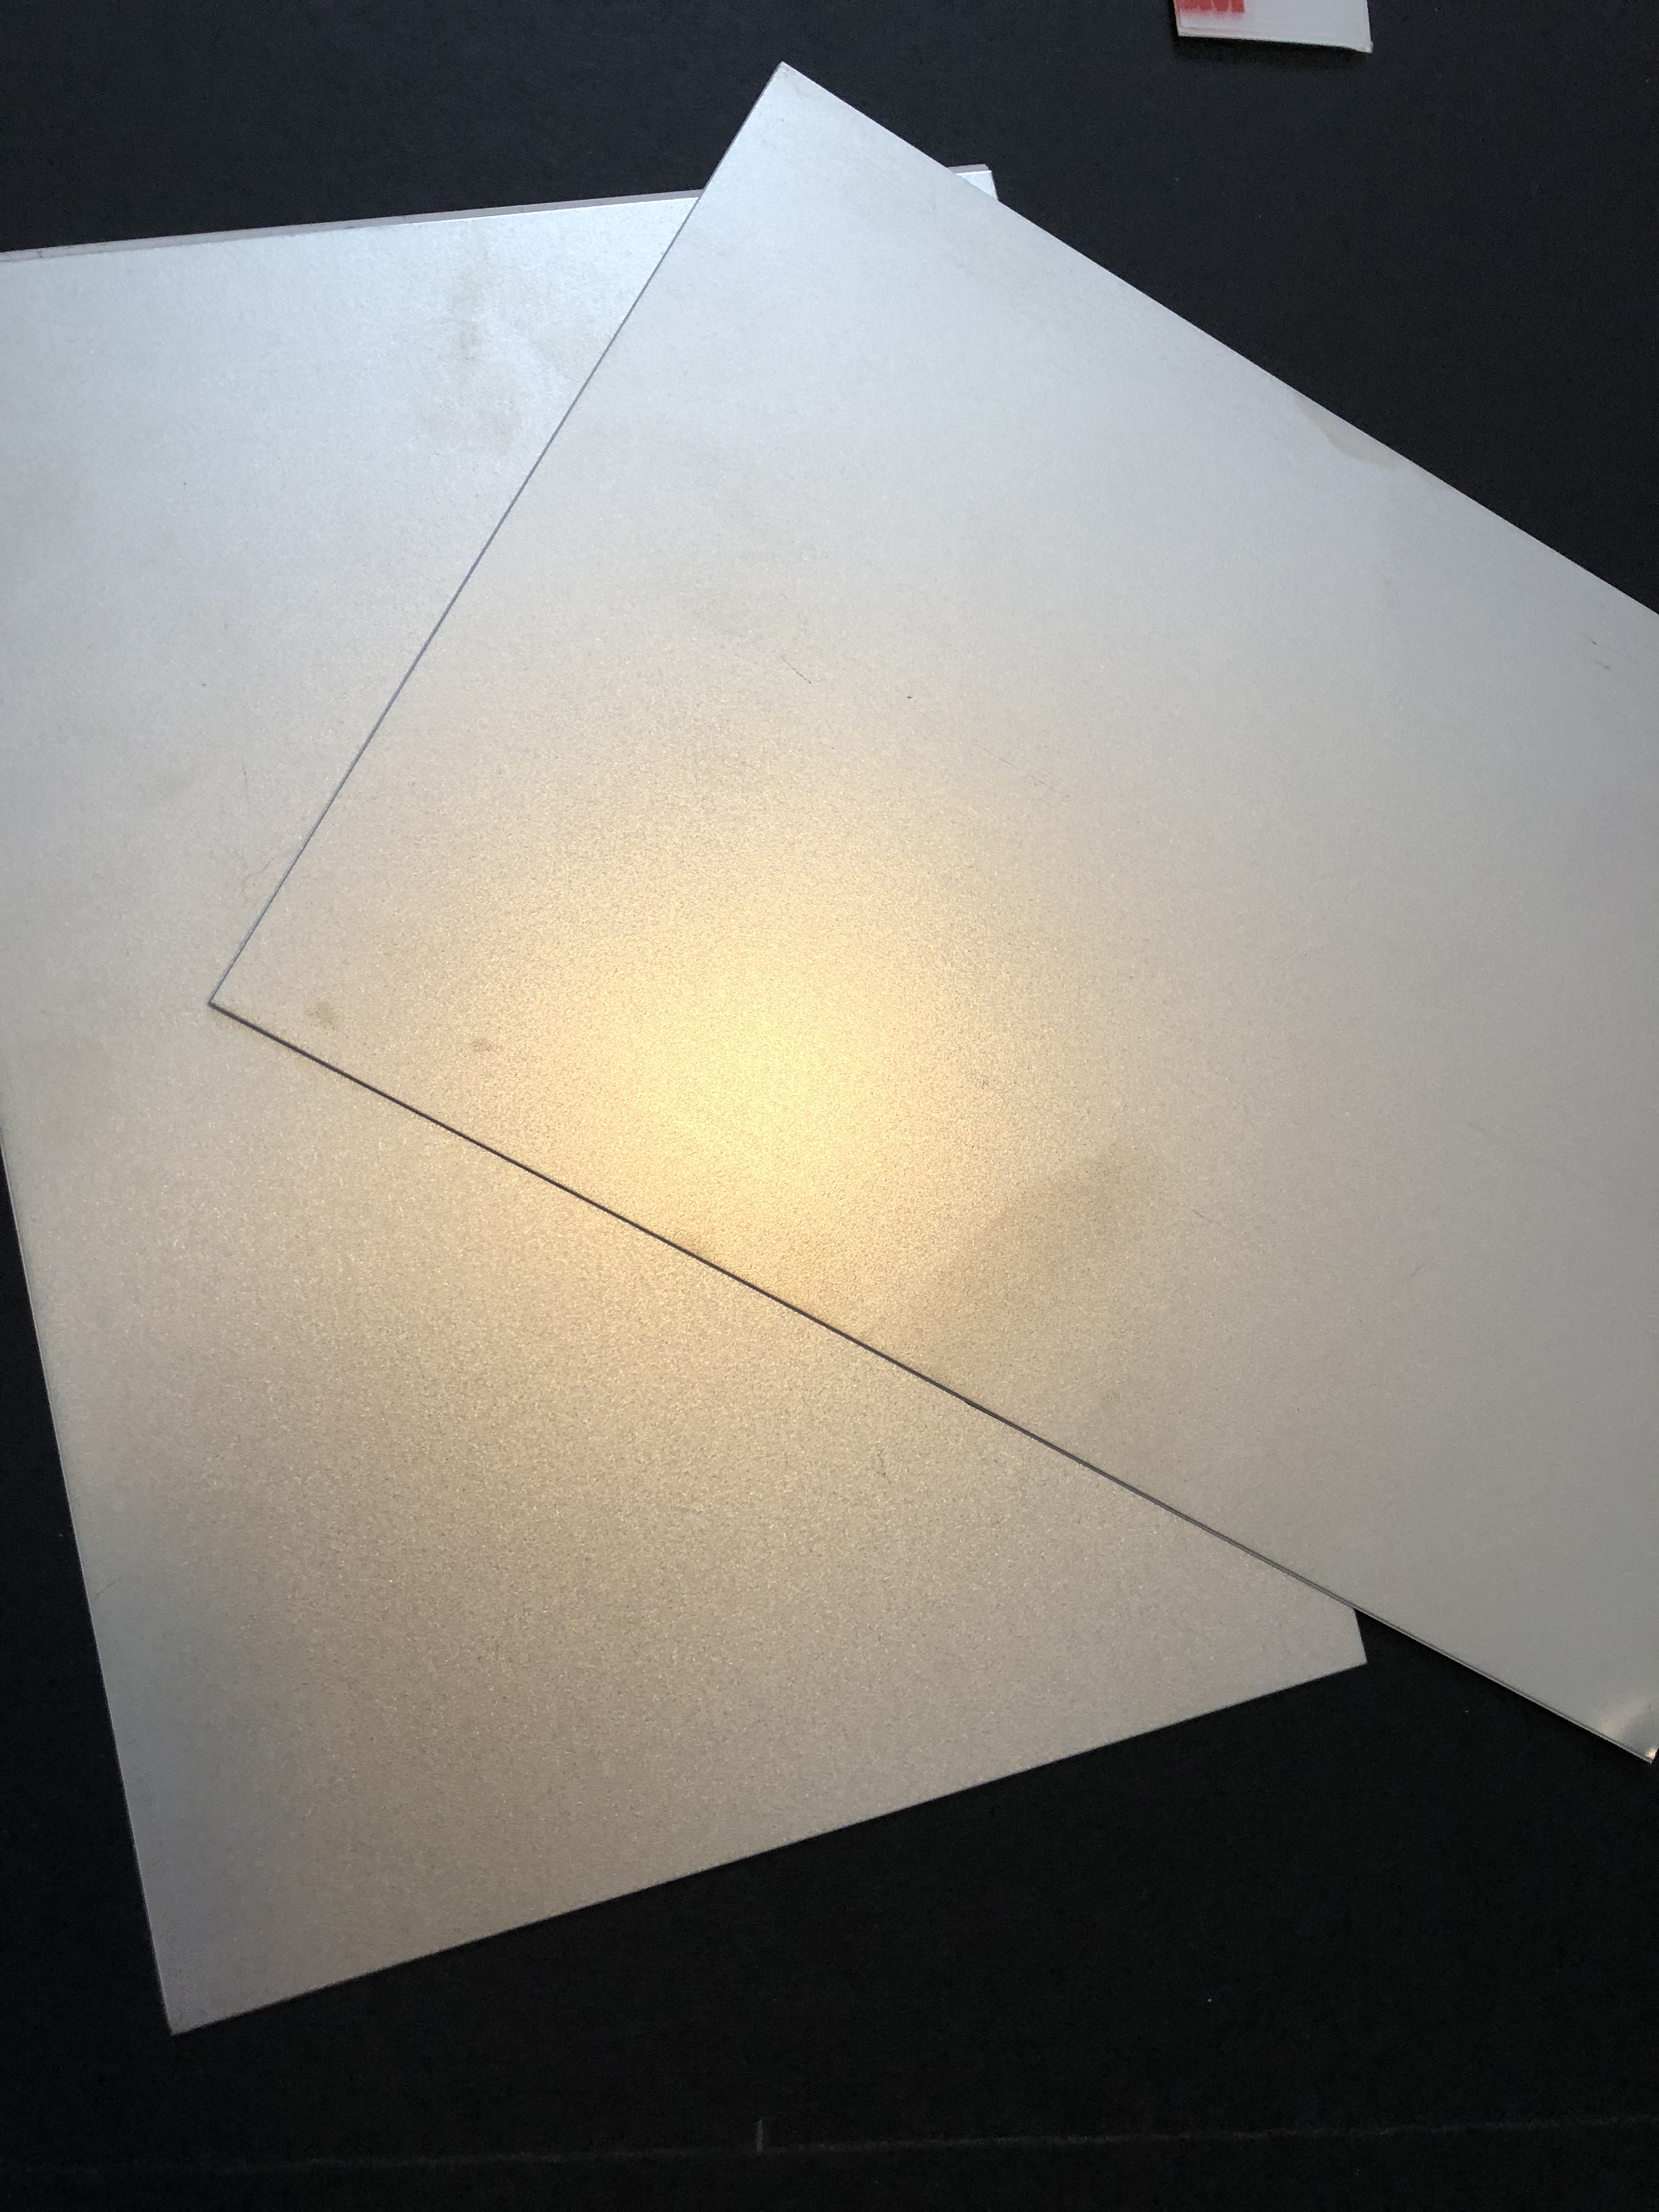
The last item that took some time was the cleaning schedule. I’m a believer in spending a little time cleaning each day goes a long way. For example, no one likes to spend an entire day doing laundry, but 10 minutes each day putting a load away, really does make the laundry more manageable. This schedule will help keep our cleaning to a minimum each day, but allow all of it to get done. To make it easily changeable, again, I used more magnets. Having the whiteboard is very useful and I didn’t want to lose the look or the functionality of the whiteboard, so washers wouldn’t work as the magnet’s support. Instead, I found small 5″x7″ magnetic metal sheets that I covered with whiteboard vinyl.

IMG_2418.jpeg

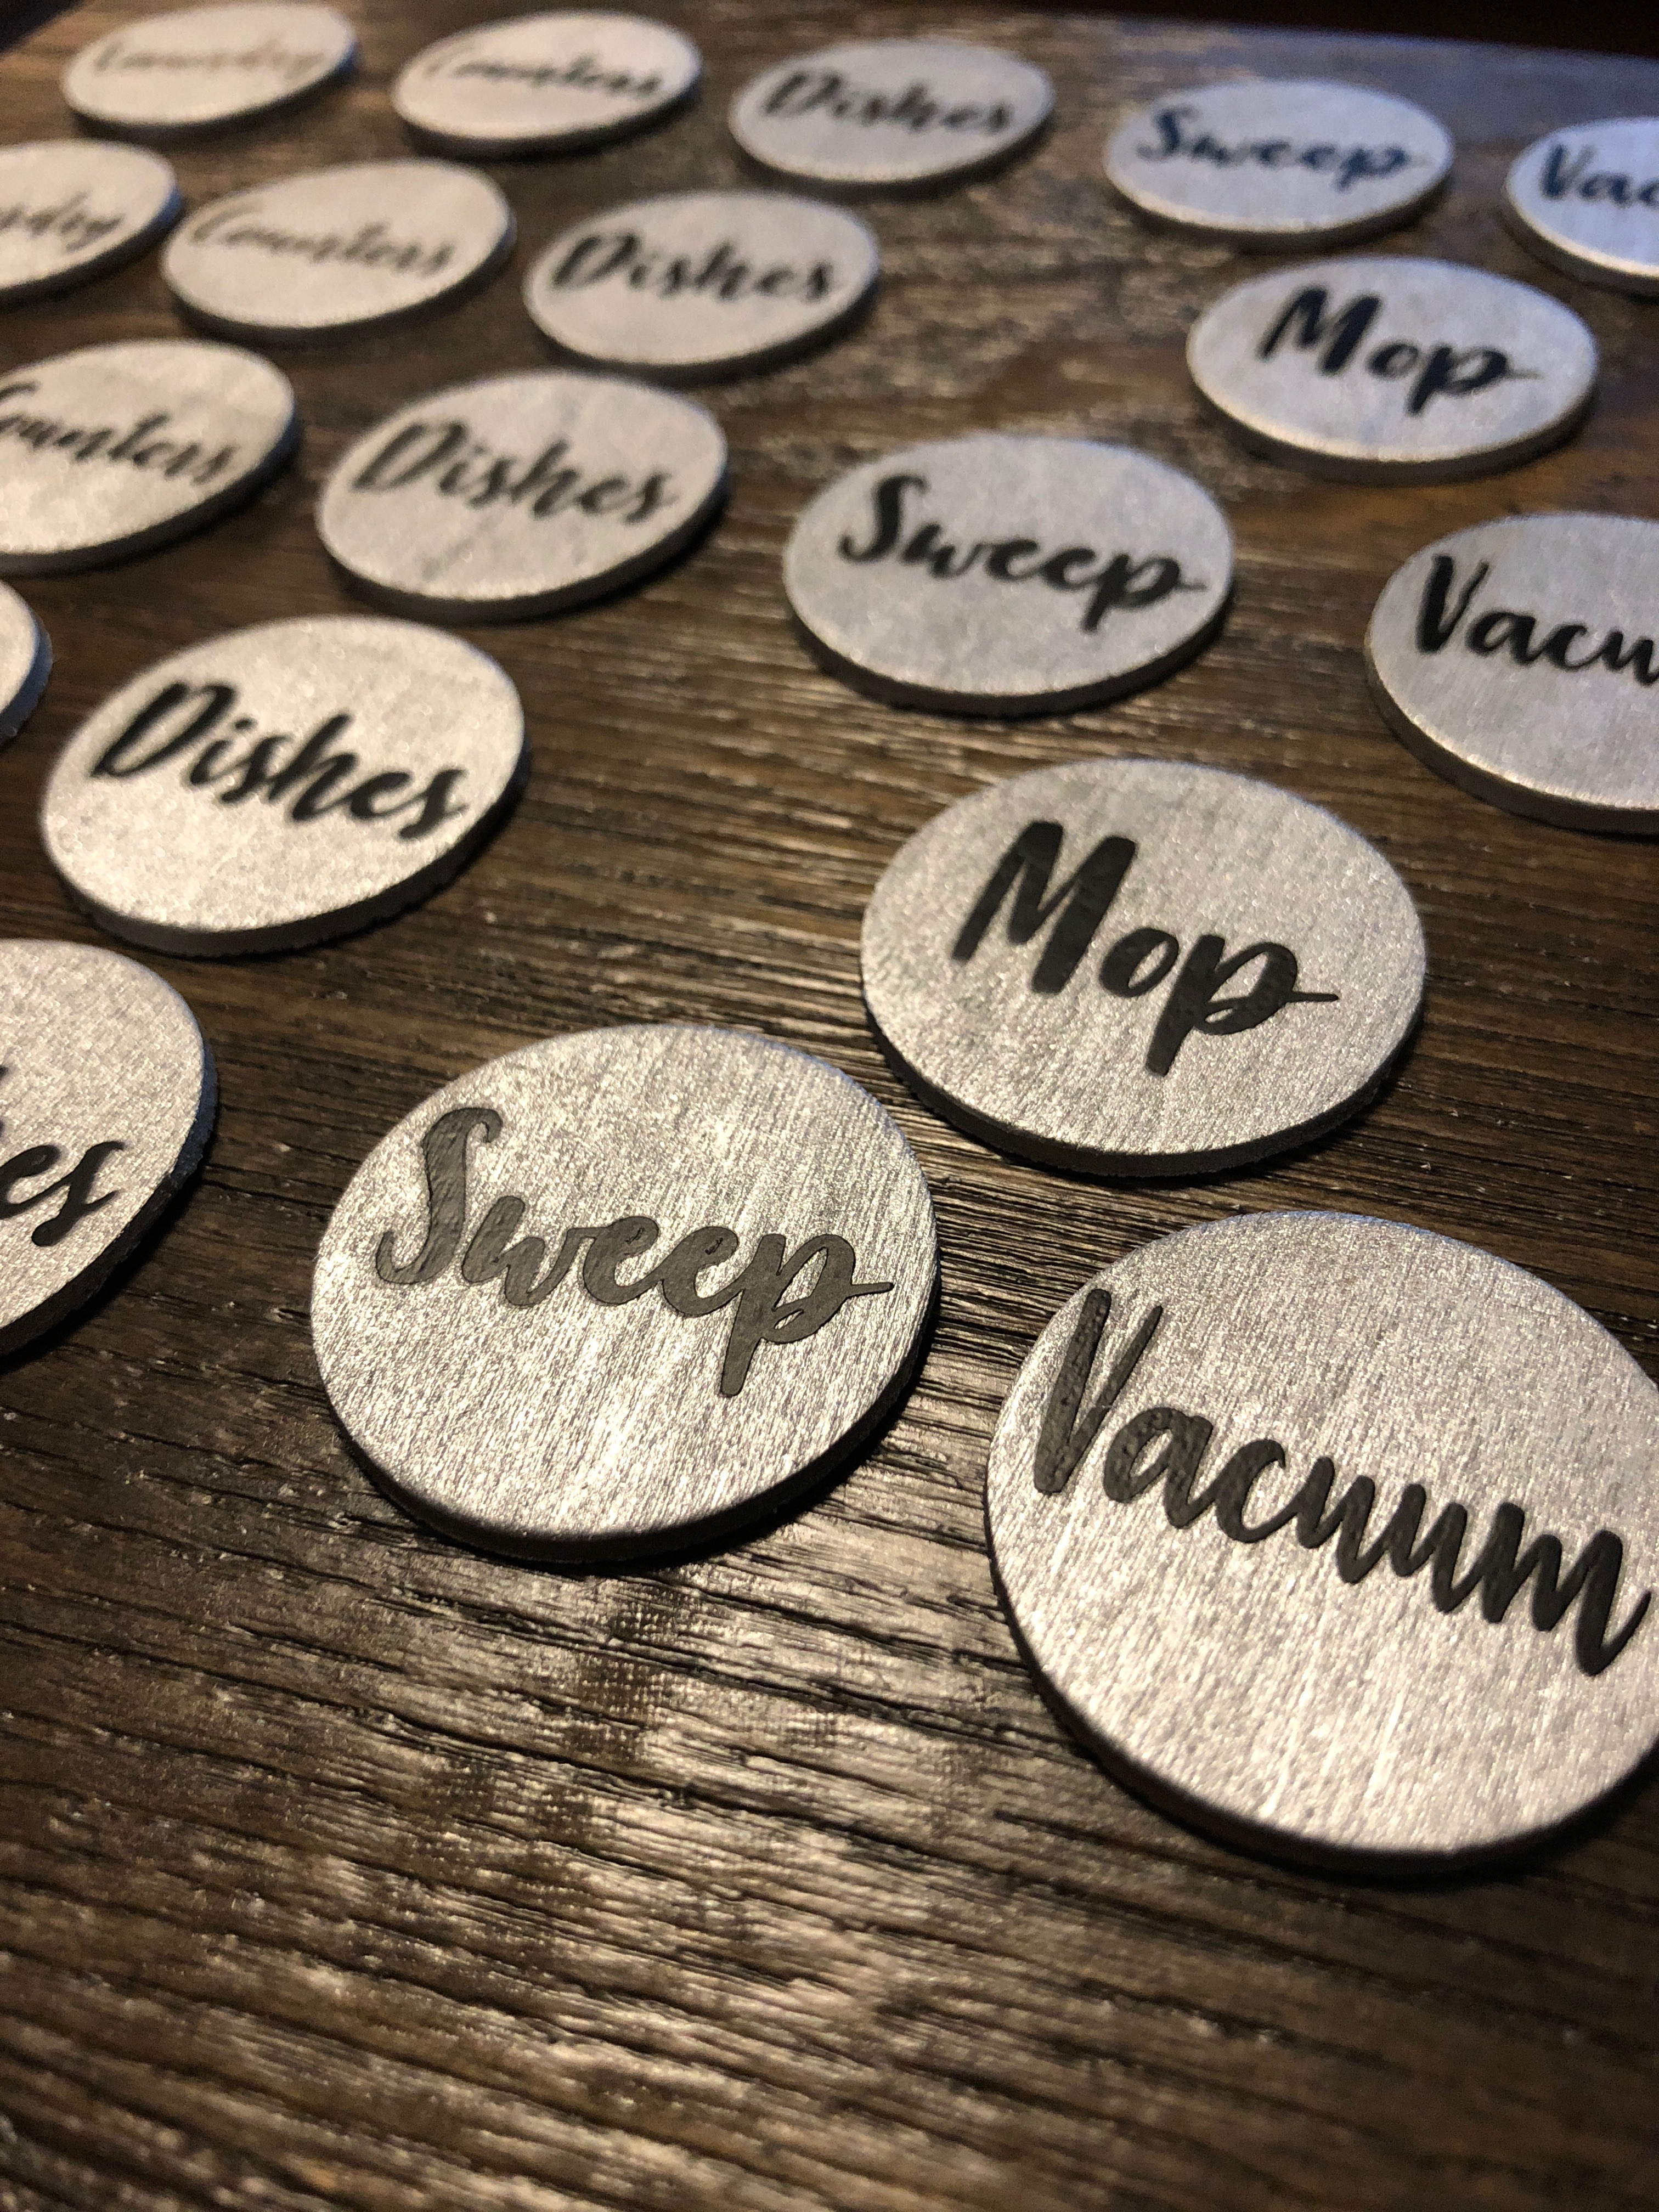
Cutting metal isn’t super fun, so I opted to use black vinyl as a divider for the “do” and “done” sections. Again, painting wooden circles, larger this time, and gluing magnets to the back. With 1.25″ circles, cutting vinyl words was do-able. Using iron-on vinyl on wood is really easy, so I planned out the week and ironed my wood circles.

IMG_2448.jpeg

🙂 All that was left to do was stick all the pieces to the door. Using mounting tape, all the pieces went up quick and stayed really well. Our single most important organizational tool in our home: Our Family Command Center.

FullSizeRender-1

How do you keep your family organized?

Surviving Cancer with Support, Love, and Judgment

From the day I met my husband, he never went into the doctor, let alone the hospital. So when he came to me with excruciating pain and said we must go in, I knew something wasn’t right. When we started this journey, I knew this would devastate us financially. Here’s why: When you do not have insurance, before you leave, the hospital likes you to meet with a financial advisor. I’m sure this is some tactic they try to make sure they will get their money. When we gave him our income, he replied, “I’m sorry you do not meet criteria for assistance, there’s nothing I can do to help with your bills.” The bills? $20,000.

At the time, we had built our lives around his ability to work. We had two companies, both reliant on his work ability and skills, both were dead in the water, as he was healing from an infection. James had a tube and a bag hanging from his abdomen and did not work for almost two months. For those of you who don’t know, my parents are the two most gracious people I know. They are always supportive. We were able to survive those two months with their help – no questions asked. James healed, and he was able to return to work.

Fast forward 5 months: The last thing we were expecting was a diagnosis of cancer. Deep down I knew that this could be a possibility given his tobacco habits, but later in our lives after we both have lived some. I never would have dreamed it would be hitting us a year after our wedding and colon? …it all just didn’t add up, but there we were newlyweds, uninsured and a cancer diagnosis.

When we were hit with the news, I had been working to help my parents expand their company and had agreed to not receive compensation until we could get what we were working on up and running. I slowly went from volunteer to part to full time. Things were still pretty bad with the growing pile of medical bills. Even after I negotiated the original $20,000 down to $7,000, we had accumulated more than $25,000 again in hospital stays, medical tests and appointment fees by this time. My parents once again stepped up and continued to pay James’ salary for the times when he was not able to work. When I did receive a check, my entire check and then some went straight to chemotherapy. Each and every time we walked through the door, which was twice a month, I handed them my bank card for $2,000. Who just has $4,000 laying around extra each month? Not me. I was saving up for a pool – my entire savings went to chemo too.

My sister wanted to start a GoFundMe page for James to help offset the medical debt. The entire time people were donating, I tried to avoid the situation. I’m a very self-reliant person. I’d much rather do everything on my own. If there is a will, and there was, then there would be a way, and I would find it. My sister finally came to me and asked me for my bank account because she kept getting notifications about the funds and needed to fulfill that portion. I reluctantly agreed because despite the $25,000 that we owed, James needed a port to receive his chemo, and when that port failed, he needed another. Before he could receive his second port, they placed a PICC line. Did you know a port placement costs roughly $3500? A PICC line costs about $1500? Within 1 month we were $8,500 more in debt.

Now, I say reluctantly, not because I’m ungrateful, I am very grateful. As introverts, we rely on self-sufficiency, we like to work alone, solve our own problems, so believe it or not it is actually harder for us to accept help from others than to struggle through it on our own. Despite our own moral dilemmas, we are so thankful for everyone that lent a hand, brought over meals, just came by to visit with us, prayed, or simply just asked us how we’re doing. Everyone who helped us in a time of need displayed such a selfless act of love and kindness and it took a tremendous burden off James and I. That act alone, we could never repay.

When January came, we got some relief. He was still receiving chemo but we were insured! The social worker signed us up for a program to offset one of the more expensive chemo drugs, which helped us meet our high deductible. By middle February, we had 100% coverage. Just because we had 100% coverage of insurance, didn’t mean our debts were good and we were home free. We acquired more payments and debt in January meeting our deductible. With the donations, my savings, and my parents help, we were able to pay bills as they came in and keep the roof over our head.

Every single day from the day I had to break the news to my husband about the cancer diagnosis, I fought to keep him in good spirits, to shield him from anything that would devastate him. He told me to sell things we had, to list our house – I refused. What good would that have done? Make it easier on us financially? Possibly but I refused his requests because there is no way I was going to allow this horrid disease to alter and ultimately control our lives. With or without anyone’s help – our lives would remain unchanged in every other aspect, I was going to make sure of it.

Cancer is depressing, its devastating, it’s life changing, but what you don’t expect is the whispers, the talk, the judgement about how you handle situations, how you deal with it and what you refuse to let go of. You get people who don’t know what to say and they stay clear of you. You get the ones who overcompensate and smother you, but you’ll also get the ones who want to tell you what they want you to hear and they refuse to respect you. My advice to all caregivers, all cancer patients: You need to do you. Do what is best for you and your family. If people donate to you, it’s a blessing and one of the most selfless acts, but don’t allow their kindness to be your insecurities. Don’t allow their judgement of your decisions to hold merit. You are the only one that knows what is best for you. Don’t be afraid to write people off who are causing you harm. True colors shine in times of despair.

Everyone finds hope in their own ways. Everyone needs help in different ways and unless you are in their shoes, living their life and know exactly what they are going through, you have no clue. There is no room for argument, no room for talk, no excuses. You weren’t there when people make decisions on what to purchase, what to keep, and where they used your help. You don’t understand their reasoning and speculating just shows your character not theirs. I fought hard to keep what we did, to acquire what we have and to have this life we live. Somethings would have been more of a struggle with the enormous amount of medical debt that cancer brings, that others graciously helped us with, but, to this day, we are still making payments on this debt.  I fought hard to keep his quad and today with the loss of his femoral nerve, he is able to get a piece of normalcy and ice fish once again, as well as, getting around our property because of the difficulty of walking on ice and climbing hills. I fought hard to keep him in treatments and when he wanted to give up, the only thing that showed a glimmer of hope to push through and finish this hard road of this difficult battle of cancer was being able to get his truck. It gave him something to hold on to, something to fight harder for, that last push to finish treatments. As for me, I was able to regain my savings after the insurance kicked in and I now have my little piece of paradise in all this mess and it duels as a therapeutic treatment for James.

It is important to live as normal of a life as possible, when you’re dealt a life of cancer. If you decide to help someone who is struggling with this devastating disease, help without question, don’t use judgment afterwords because you don’t understand what they are going through and you are speculating their financial situation.

Supporting the fighters, admiring the survivors, honoring the taken, and never giving up hope.

To everyone that has helped and supported James and I through our journey – we can never express our gratitude enough. We strive everyday that we pass along your kindness, selflessness, and love and pay it forward to a fellow fighter – to someone else who needs it, whether it be a special gift to raise their spirits, financial support to make that payment so they don’t lose everything they own or to give them our time, an ear to listen and advice that is solicited.
DIY Shirt Repair

When my husband and I first met, he discovered I had never been over the Mackinac bridge so he paid a ridiculous amount of money to drive me across to the UP and back down and then took a ferry over to the island. 🙂

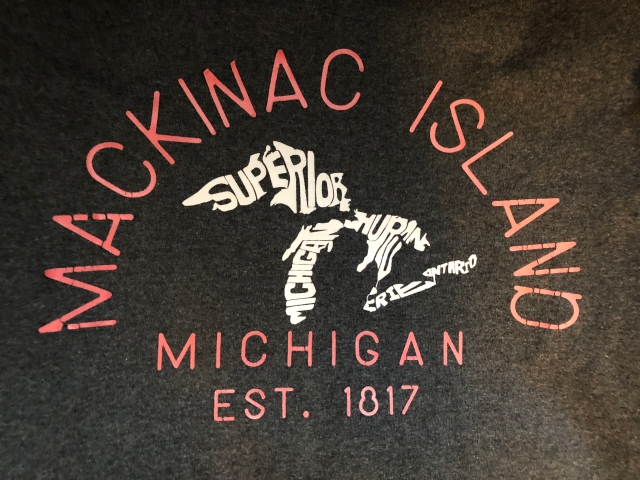
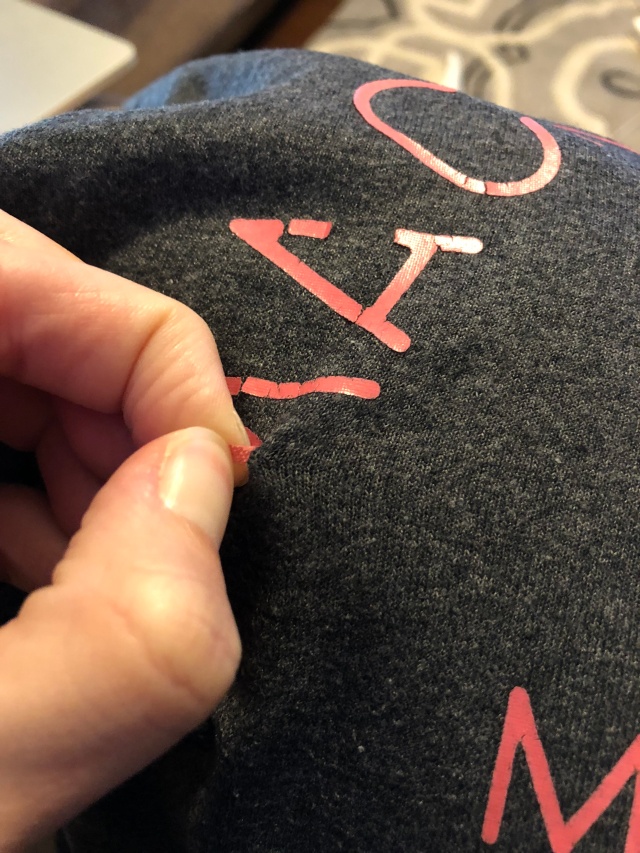
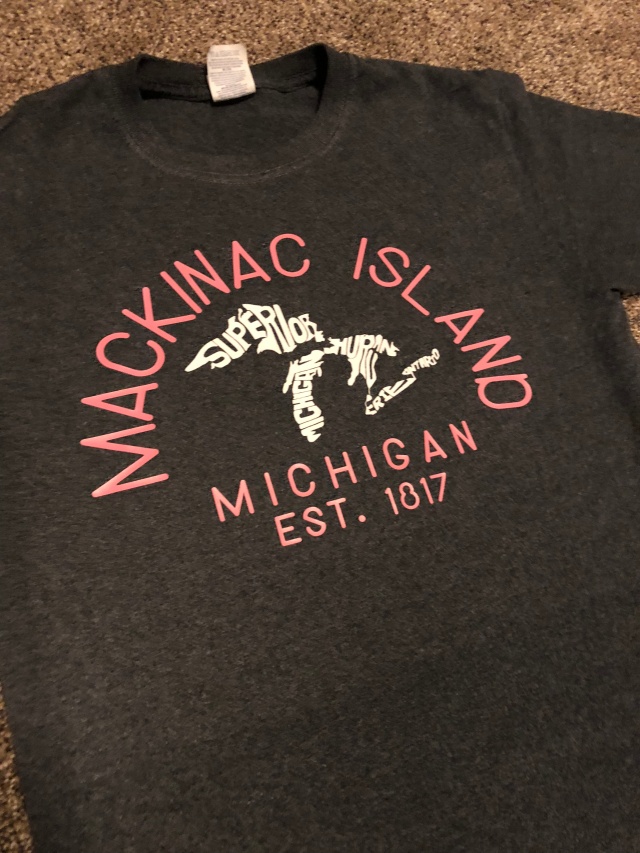
Since then, we have been several times to Mackinaw City and the island. One of my favorite things to do in Mackinaw City, when we visit, is to shop! I love the $5 t-shirts – for some reason those cheap clothes are the most comfy. Unfortunately, sometimes you definitely get a shirt worth $5. One of my favorite shirts started to peel and flake off.

mackinac

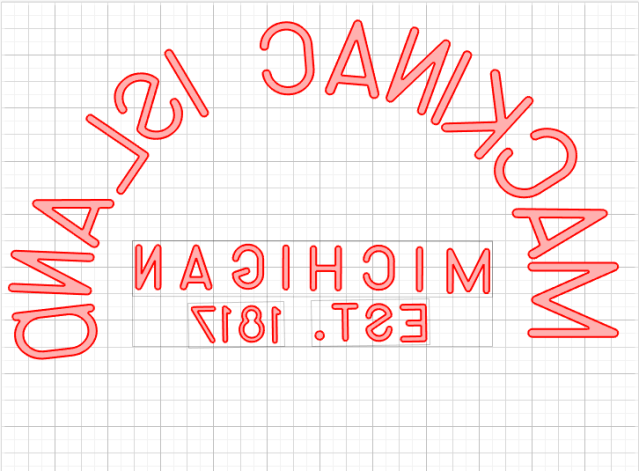
At first, I didn’t mind but the image started getting snagged on everything. So, of course, I took it upon myself to fix it. I started by taking photos of the shirt to find that same font. Using a couple of websites to find similar fonts, I was able to find the exact font they used. Next, I recreated the image in my Silhouette studio.

Screen Shot 2018-01-03 at 7.18.04 PM

Removing the old was a breeze. Peeled right off.

IMG_2049

I did end up enlarging the font slightly and here is why: When you make a mistake with vinyl and remove it, typically, it leaves residue behind on the shirt. I enlarged my font slightly to cover the residue. Although, it wasn’t necessary in this case because the old came off so easily it left nothing behind – I ended up leaving the font larger simply because I didn’t bother changing it back to the smaller size.

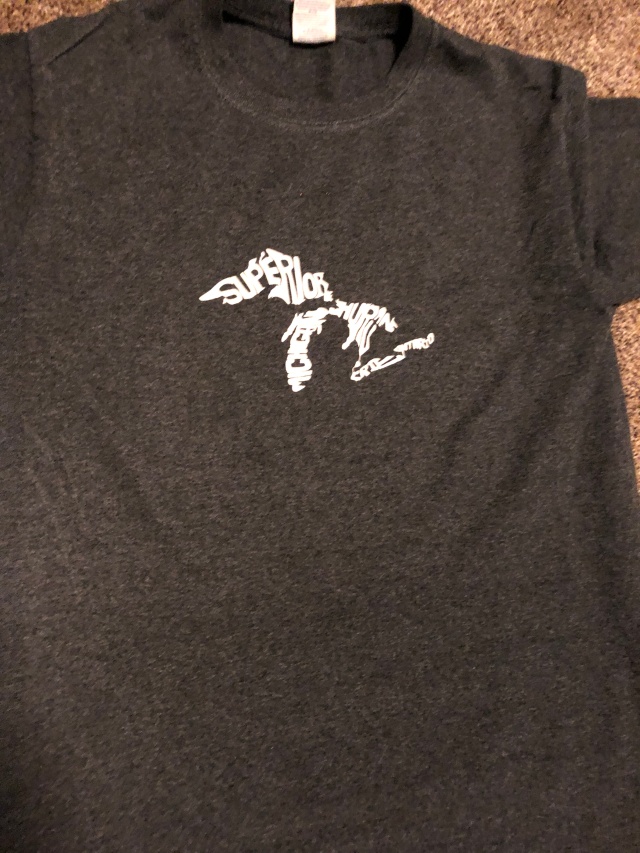
Eventually, I was left with a plain shirt, well almost plain. I did keep the lakes because they appeared to be adhered fairly well.

IMG_2051

I cut my image on new vinyl and heat pressed the shirt.

IMG_2076

It’s exciting when you can fix your $5 shirt that you love!

Take time to do what makes your soul happy

As good as it’s going to get… for now.

It’s been a long time coming and it’s not completely finished because one day this entire room will be demolished. So, our bathroom included a walled off section from a closet we closed off that will eventually be opened to make room for my claw foot tub, a giagantic useless closet, an old tub with nice flowery tiles, and a vanity with the drawers painted shut. 😊 Functionality at its best, I know. 28392E9D-8C62-436C-B515-A939611BC6F6.jpeg

Since we moved in, we slowly worked on this room here and there not wanting to spend a ton of money when the end goal was to demolish it all, but we needed it bearable until then. Before we moved in, the toilet was replaced – just a personal  thing of mine. Second, I painted. The lilac color was great don’t get me wrong, I just felt gray was better for us. 😉 And of course, wood trim painted white. The brightness – I could cry! 😂

C364C419-A818-4984-9C27-CAACB9CD0505.jpeg

Randomly, my husband decides to get a new vanity. He’s very spontaneous on our house projects.

This vanity was a little bit smaller so finding the, what I called “pond scum,” tile was a bit of a challenge but Menards came through with some accent tile that went well. We had some left over so I ended up popping some tiles in front of the tub and adding some there too. We added a tile back splash and removed the medicine cabinet and replaced it with the mirror that came with the vanity.

The bathroom stayed that way for quite some time. Until I figured out how to mask shower tiles. Changing the floral tiles to white – best thing ever!

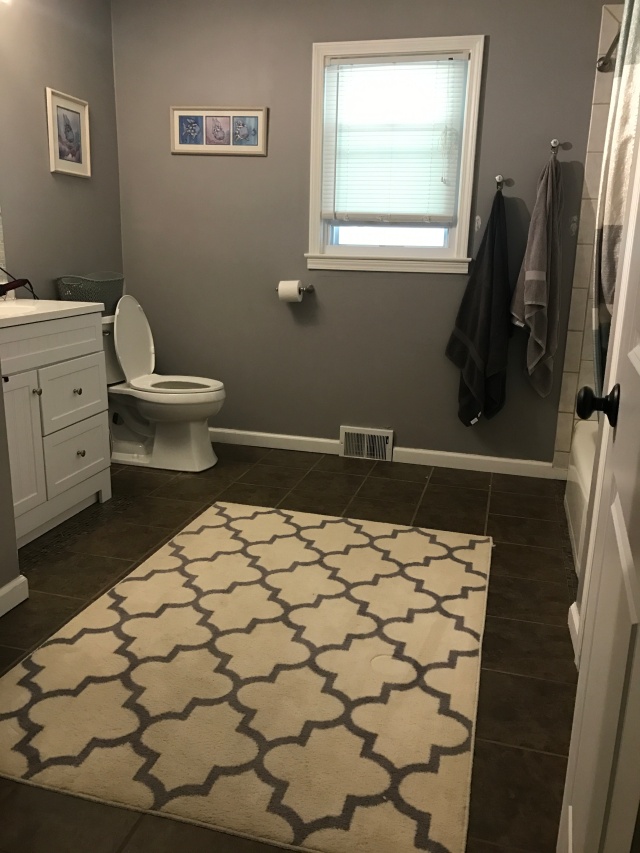
For a while, I tried to cover the dark floor with an area rug.

02EAE3DA-A210-4B3F-9CC1-262A7758687C

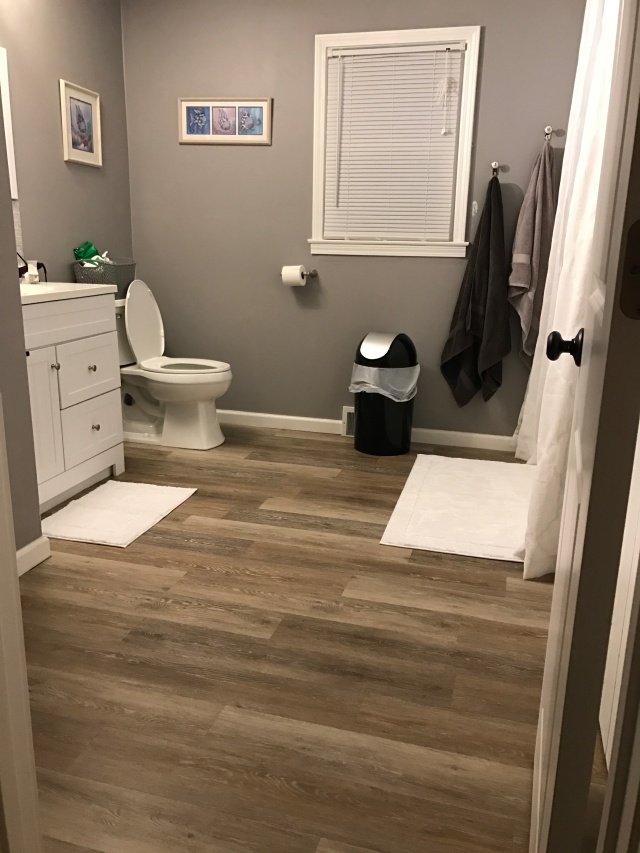
Until eventually, we masked the floor with something lighter, and switched out the shower curtain with taller, lighter ones.

90BF7847-5AE4-4A6D-8C3F-64A89F1DFD2B

Lastly, I got around to painting the giagantic closet. Yes, that’s pink. Walls, ceiling, trim…

Working on the house is one of my favorite things to do. It’s more of a before and after kind of thing that makes it worthwhile to me! 😊

Do you have any favorite before and after DIY?


Glitter and Wine – What more could a girl ask for?

IMG_1329.JPG

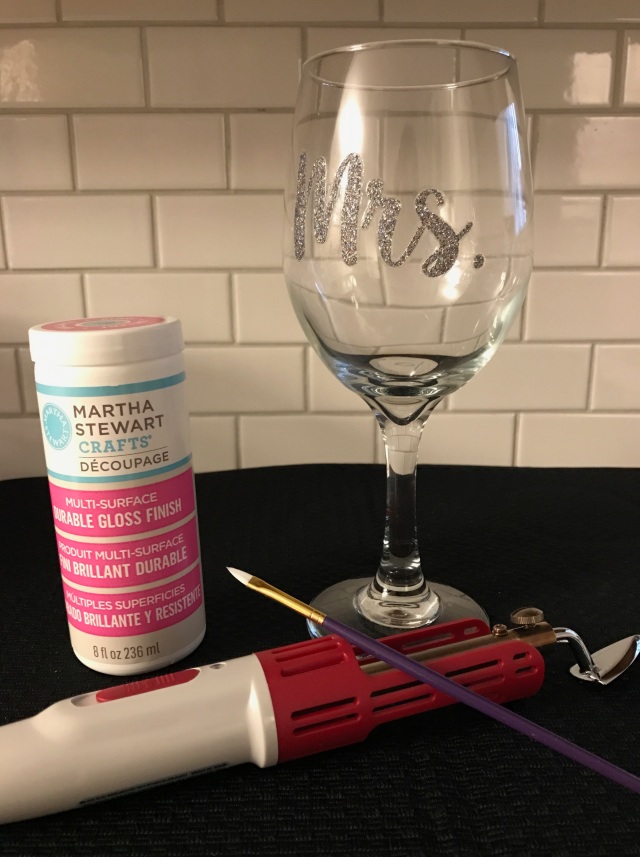
Ultimately, this was an experiment for an idea I have been seeing. Apparently, you can use HTV (Heat Transfer Vinyl) on glassware and it would become “dishwasher safe”, so naturally, I had to try it. Gathering my supplies of: A wine glass, craft iron, my silhouette cameo, and Glitter HTV – I got to work.

Since this was a test to see if this idea off Pinterest and a couple blogs I have found works, I wanted to keep my design simple. I tend to get deep into a design that I start to fall in love with and when it doesn’t turn out – it’s truly devastating, for real, all that time, work, effort… Keeping it simple for this one.

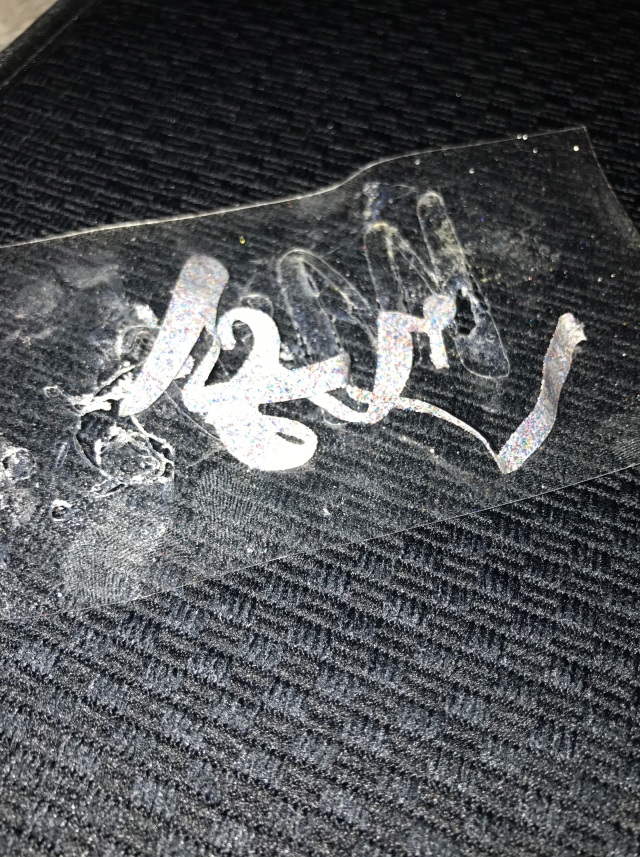
On the surface, it turned out! The HTV ironed right onto the glass, plastic came off without a hitch. My confidence in this experiment was growing slightly. I’m always skeptical if I cannot find solid evidence on an idea with proven results.

To put it to the ultimate test, I threw it in the dishwasher and turned the heated dry off, to give it a fighting chance. After about an hour, I was eager to check on it. The results?

Pinterest FAIL: HTV on glassware is NOT dishwasher safe. See Below:

IMG_1327.JPG

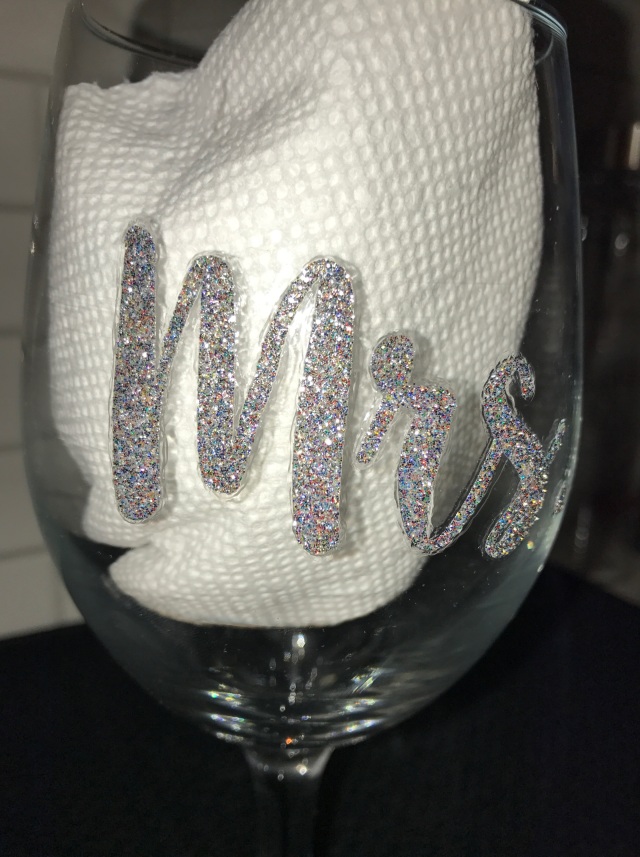
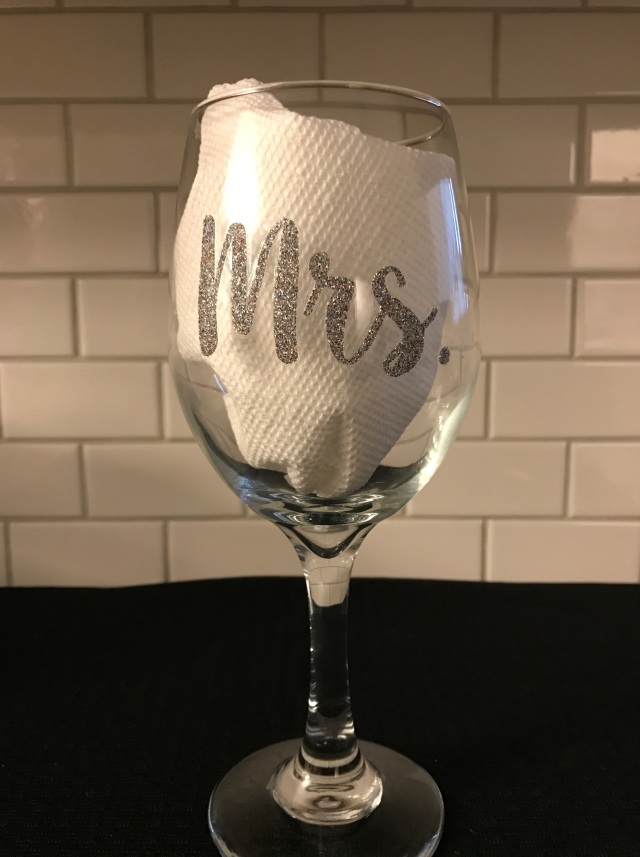
Reading though the comments on blogs, there are some crafters that say it works, others say it doesn’t. Here are my thoughts: The M was MIA and the r and s were still in tact with mine but when i dried it the r and s wiped right off. If you’ve ironed on HTV to glassware and ran it through a dishwasher and it came out still intact – pure luck. Maybe the water was too hot, maybe my water pressure is too high. I don’t know the answers but what I do know is that the HTV can be picked off with my fingernail and that tells me there’s no possible way it would survive even a hand-washing. So, it’s good to know – HTV does NOT stick through a dishwasher on glassware, but I wasn’t going to give up on this project. I cut out the same design, cleaned the glass once more with rubbing alcohol and applied “Mrs.” again with my craft iron. This time I painted around and on the design with Martha Stewart’s Durable Gloss Découpage.

This isn’t the first time I’ve used this product but I’ll admit I’m pretty impressed with it, comparing it to Modpodge – it appears to be a better product for these types of projects. Last month I tried it out by making my mom a birthday present. It turned out cute but I wasn’t thrilled with how the brush strokes turned up on the glass from the Découpage, forcing me to paint découpage around the entire glass but I’m glad she loved it anyway.

So this time around, I only painted the design instead of all over. This stuff dries like a durable hard plastic coating, which should protect the HTV.

IMG_1326.JPG

The bottle claims it’s dishwasher safe after allowing it to cure for 28 days but throwing everything, especially my wine glasses, into the dishwasher isn’t necessary to me so hand-washing this will be a-okay!

IMG_1324.JPG

Since the découpage has dried…

IMG_1331.JPG

Happy Friday! Hakuna Moscato. ❤

A Little Curb Appeal

There were a lot of things to tackle when we first bought our home. After crafting and renewing most of everything inside, I decided it was time to work on the outside a little before winter. 😊

CB174274-13AF-4A28-9CC6-95ECAED598BE.jpg

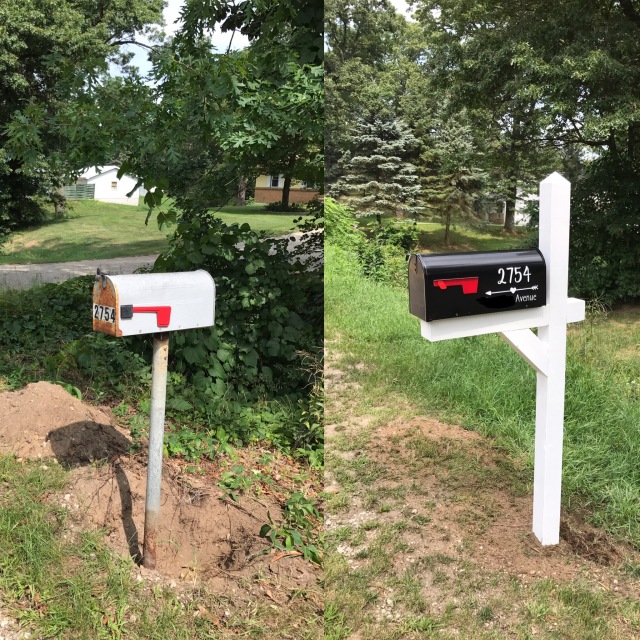
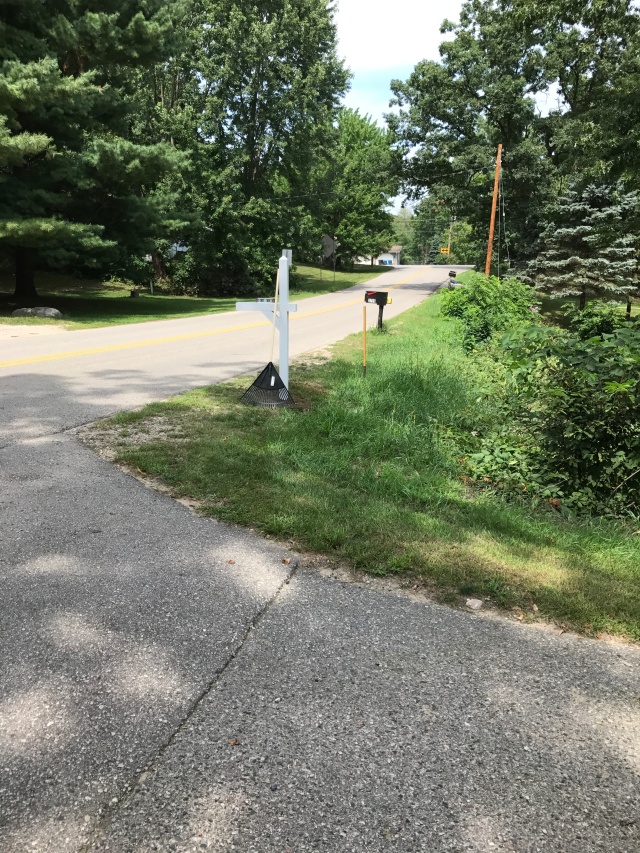
I don’t think we need a “before” and “after” for this photo. 😉 Our mailbox was rusting, leaking, and lacking. Our road is quite busy and the mailbox was on our neighbors property – walking in the road to get the mail wasn’t ideal and not being able to see the box from our house wasn’t working for me.

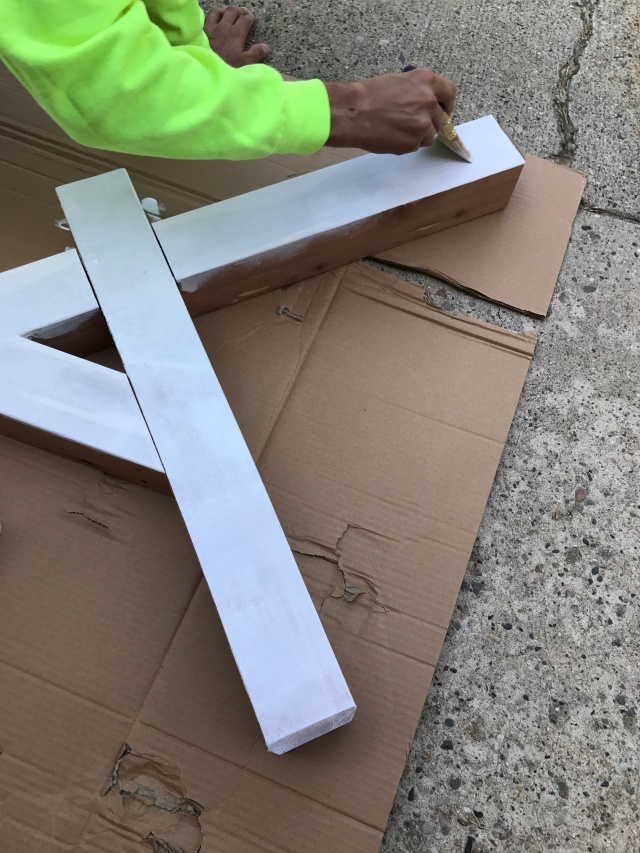
Originally, I was going to remove the old box and spray paint it but we decided it would be better to replace and relocate the entire thing. So my husband and I grabbed a post at the local home improvement store and painted it white.

IMG_0864.JPG

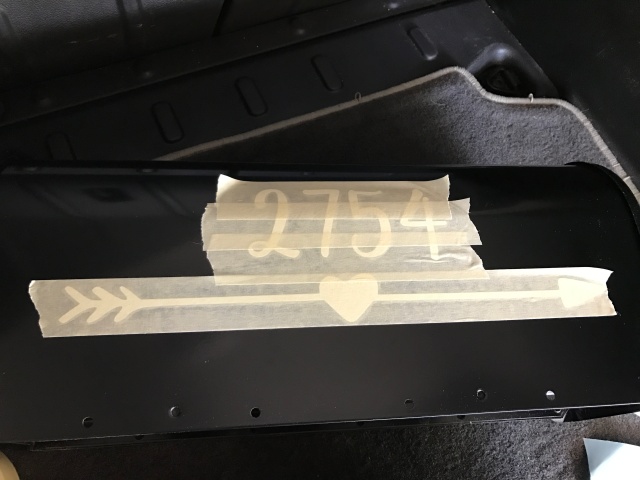
Since I would be testing out some new vinyl on it we didn’t want to spend a ton in case it didn’t turn out, so we picked up a very inexpensive mailbox. I recently acquired some Oracle651 vinyl which is permanent adhesive vinyl meant for outdoor use. Perfect for mailboxes! 😍📪

IMG_0867.JPG

I was slightly nervous this wouldn’t turn out because the vinyl was more interested in sticking to the scotch tape than the actual mailbox, but it all eventually worked out the way I planned and adhered. While I applied decals, the new post was put in place on the opposite side of the driveway (on our property this time and we don’t have to walk in the road to get the mail!).

IMG_0880.JPG

Once the post was set and leveled, the old one was removed. (Thanks to my father-in-law pictured below)

IMG_0883

After all was done and we admired our work, I realized how much a simple inexpensive project leads to so much curb appeal! Here’s the before/after:

CB174274-13AF-4A28-9CC6-95ECAED598BE

Does your mailbox need some updating? Doing some simple inexpensive projects around your yard can add so much to the overall look.

Healthy Ice Cream

IMG_9729

Lately, we have been trying to eat extremely healthy. You never think cancer can happen to you until it does. America’s biggest addiction is food and it’s hardly food that we eat but chemicals the government passes as edible. Have you ever seen Wall-e? Sometimes, I think… will that be us someday? 😕 Hovering around on our scooters because we trashed the earth and do nothing but stuff our face with fake food. Breaking this chemical-ridden “food” addiction is extremely difficult but when you can enjoy things you love in a healthy way it makes it easier.

We believe strongly that what we eat directly affects our health. So, staying away from processed food as much as possible means my husbands all time favorite too – ice cream. He requested some ice cream tonight so I went to work.

IMG_9733.JPG

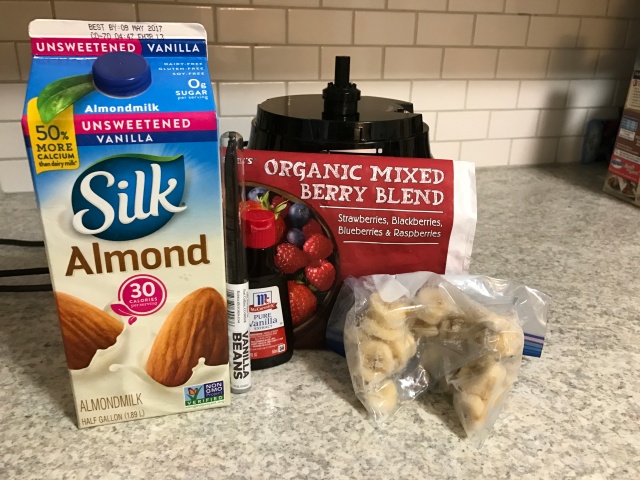
My ingredients included:

frozen organic berries, frozen organic bananas, a splash of unsweetened almond milk and either vanilla extract or vanilla bean.

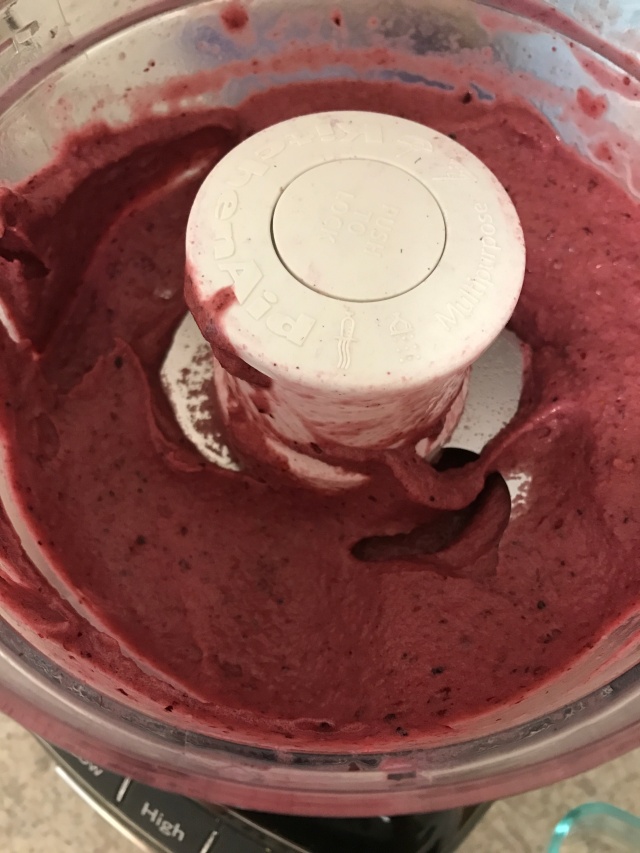
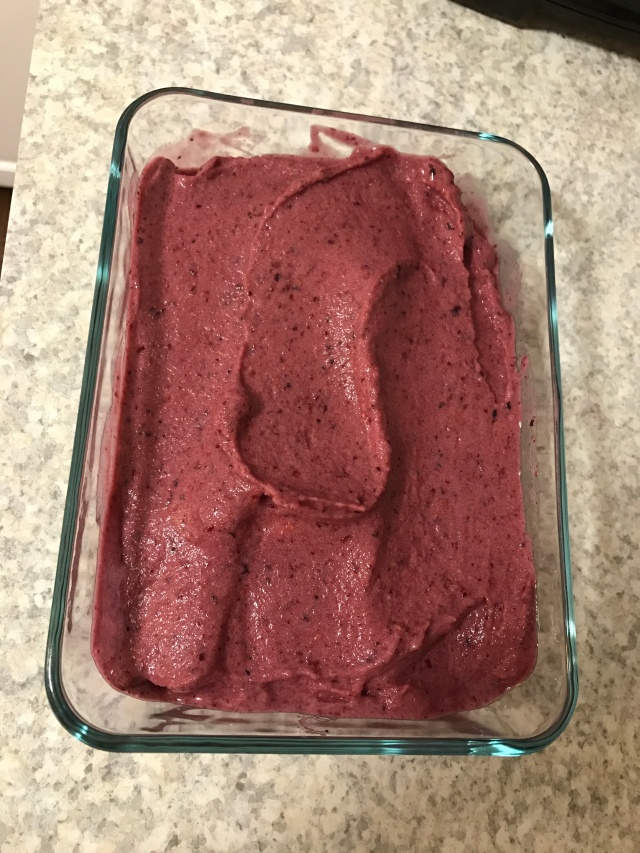
Making berry flavored ice cream took all of about 10 minutes in prep time. I threw all the ingredients into my food processor and let that work while I grabbed some dishes. It made about 5 cups total.

I buy a lot of bananas of the organic variety, of course! When they start to turn brown before they are a total loss, I cut them up and freeze them. They are perfect for smoothies or healthy ice cream!

After processing, I scooped it out into two dishes and stored them in the freezer for about an hour to allow them to firm up.

IMG_9730

Recipe:

4 frozen cut up organic bananas

1 bag frozen organic berry mix (Trader Joe’s)

3/4C Unsweetened Almond milk

1t Vanilla Extract or Bean

-Mix together in food processor or blender. Freeze. Enjoy!

(Trader Joe’s has a large selection of frozen organic fruits. You could replace the berries with your favorite fruit.)

Let me know your favorite flavor if you decide to try your own version of healthy ice cream.

Lately, I have been watching some interesting documentaries on other’s journeys into healthy eating. Like us, you change your ways when a serious life threatening disease invades your life. It doesn’t take long to realize the food we eat means everything. The last documentary I watched was Fat, Sick, & Nearly Dead. If you’re interested in watching it’s available on iTunes, Netflix, and Hulu.

DIY Hummingbird Feeder

IMG_9728.JPG

Since we have most of the inside of our house remodeled now, I’ve been working on the outside with summer coming up.

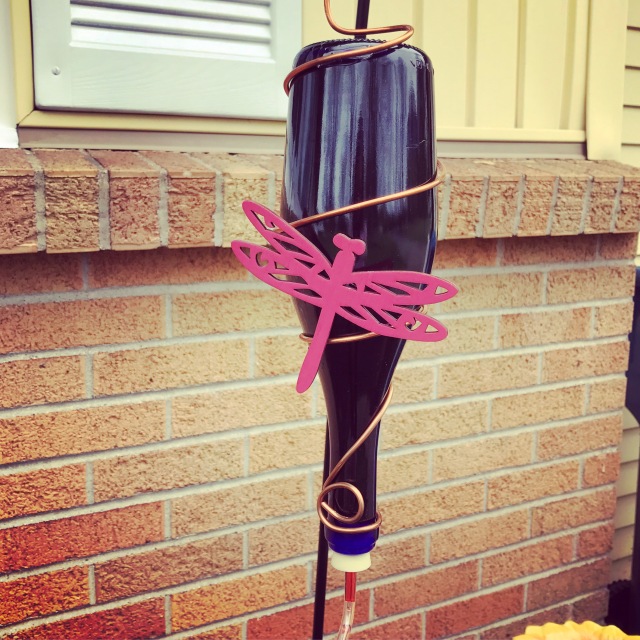
A while ago, I decided to save some empty wine bottles for a craft. At the time, I wasn’t sure what I would do with them. This spring, I decided to use them to make hummingbird feeders.

We have a bird supply store nearby, so I was able to grab a feeder for a bottle and the copper wire at the home improvement store. I picked up the decor at the craft store.

After wrapping the bottle with the copper wire, I added the wooden dragonfly. I painted the dragonfly with spray paint from a previous project and clear coated it to protect it from the elements.

Finished up by filling the bottle with hummingbird feed and placing it outside.

A short post for a quick outdoor project. 🙂 Happy Easter!